How to get a Good Live Sound

A Guide for Guitarists to Sound Good in a Live Setting

Guest Post by Guitarist, Jason Rooney

Live Guitar ToneA live gig can sometimes be a chaotic environment. Cramped spaces, gear and cables everywhere, nervousness, tensions between band mates, promoters, sound men, just to name a few possible distractions. There are enough variables to cause headaches and keep every musician from what I feel is the ultimate goal: Making the best musical and artistic expression you can. I’ll do my best in this article to offer some tips that have made my live playing experiences a little less hectic for me and have allowed me to focus more on my own musical expressions.

It is important to remember that all instruments should share the sonic space and not fight for it. I find this especially evident in the case of the electric guitar. One of the biggest struggles for some guitarists is how to fit it – tonally. Most great players have no problem filling in a solid rhythm or lick here and there, or even pulling out all the stops with mind blowing solos, but if that all gets lost in the mix of everything going on, those efforts and musicianship can often go unnoticed. Finding a sonic balance can be challenging and often perplexing. It seems that many guitarists have the tone they want in their head, and when they dial it in and play, it can sound muddy or even like somebody has driven ice picks into your ears. Everybody has their preferences and opinions of tone, and that is one thing I love about the guitar, but everybody should take some time to clear up their tone. This means, finding where the voice of your guitar blends well with the other instruments for the type of music you’re playing, as well as the room you’re playing in. See how the bass of your instrument blends with the bass guitar. Is it too boomy, or is it tight and pronounced? Are you struggling in the same space with keyboards or horns? I know a lot of us like to feel what we’re playing too, but that can get muddy quick. Don’t get caught in what I like to call the treble trap. I’ve heard a lot of players, particularly those who favor large amounts of distortion, who tend to go overboard with the high end, often sounding like a nasally buzz saw with no note clarity. I feel that the guitar really sings in the midrange, with a good balance of high and low on either side.

RELATED: EQing your Guitar Amp

Having the best equipment you can afford and keeping it well maintained is almost a requirement, especially in the live gig or touring world where gear certainly can receive a beating. Let’s start by looking at the signal path as a whole starting with your instrument. A guitar that is comfortable to play and has been intonated and tuned properly can save a lot of time tuning between songs, or even worse, in the middle of a song. Having the freshest strings you can help you start with a good crisp and clear sound that will articulate better into the pickups, through your guitar, and on to your cables. For cables, many folks have brands they stick to, but I’ll recommend something that is durable on the stage, has little to no “hiss” and that are shielded well to resist as much outside interference from other electronics, radio frequencies, etc.  Again, there can be a lot of chaos going on around you, so protect that signal and send it clearly on its way to the next stop in the chain.

When it comes to the pedal board, if you are a player who uses effects, this is where things can get very muddy. My “quality cable rule” definitely applies to pedalboards. Don’t skimp on patch cables. Get the best you can afford, because remember they are part of the chain too. Be sure your pedals have adequate power. Low batteries can suck your tone, especially in digital effects. There are some cases where a dying battery, or voltage sag, can give some distortions or fuzzes some cool qualities, but I digress. Beware of power transformers or wall warts that hum. A good regulated power supply is recommended here. It’s also a good idea to be sure that your power supply is going to handle all the pedals you plan to power with it. Most power supplies with have an output rating listed in MV, and your pedals should have an indication on the power they will need to operate properly. Then there is the argument for True Bypass. The area of input signal bypass can be a bit subjective, but I say, if there are any pedals that are making an obvious dent in your tone, replace it or get a bypass loop. Also another topic for a different article. Now, send that effected signal out to your amplifier of choice with another cable of good quality.

Last stop, the amp. It may not always be possible, but I recommend pulling your power from a dedicated circuit into some sort of power conditioner. This will allow you to have the cleanest source of power possible that can be monitored, and one that is also resistant to any other instrument pulling current from you when you most need it. A clean, strong power source will also ensure that your amp can operate at its fullest potential without any extra unwanted interference. Again, having a well maintained amp will help you be clear and powerful.

A little extra preparedness will always pay off. Having spare cables, strings, picks, tubes, extension chords, batteries, just to name a few, have saved me many times. The live gig is an unpredictable environment where Murphy’s law reigns supreme, but if you have a backup plan, no worries!

Live tone can be tricky and is certainly a matter of personal taste, but if you have durable gear you can trust, the cleanest signal path possible, and backup for any possible situation, you can put your mind at ease and let your ears guide you sonic dominance.

Controlling your Guitar Tone with your Volume Pot

guitar volume potYou can get a variety of tones via your guitar’s volume pot. Here is how it is done:

1) If your amp is cranked and is breaking up nicely, you can roll off your guitar’s volume pot to clean up the tone. This works great with tube amps. It’s also a nice way to do it with lower wattage amps that tend to break up quickly. So with your guitar volume rolled off, you are good to blend in with rhythm parts, and then maxing your guitar volume will help you cut through the mix in solos with a dirty guitar tone.

2) Pedals – some pedals work marvellously for this purpose, especially fuzz pedals. A cranked fuzz pedal can clean up considerably via your guitar’s volume. You can find a whole array of tones with a tiny turn of your guitar’s volume knob. This also works with overdrive pedals.

3) Pick attack – Rolling off your guitar’s volume gives you more leeway to attack your strings harder, creating different tones in itself. If you want to accentuate subtle tones, you can crank your guitar’s volume and pick lightly at the strings.

4) Feeling too much sustain? This can easily be controlled rolling off your guitar’s volume pot.

5) Volume swells – this is a very cool effect. Basically you have your guitar volume all the way off. Then you strum a chord with no volume, and then roll your guitar’s volume up after the strum (can be done smoothly with your pinky finger). This will create a cool volume swell which is great for more ambient-like parts of a song.

By now, you probably get the point. So try some experimenting, and you’ll see how many different things you can do with your guitar just with its volume pot. Don’t forget, you also have a tone pot too ;-).

How to use a Wah Pedal

vox wahI have had some requests on how to use a wah pedal. This article will show you how to use it, and also have some great wah pedal tips to really take full advantage of the pedal. So lets get started.

What is a Wah Pedal?

A wah pedal is in the form of an expression pedal. When you engage the pedal, having the rocker toe-down will make your guitar tone full of treble with little to no bass. Alternatively, having your toe up and the back of the rocker pushed down will make your guitar tone have lots of bass and little to no treble. So rocking the expression pedal back and forth will let you go from bass to treble, creating a “wah” kind of sound. Since it is an expression pedal, there are a ton of positions the rocker can be in, to get the desired amount of treble and bass.

RELATED: The Best Wah Pedals on the Market

Tips to Best use your Wah Pedal

  • Using the neck pickup with make a fatter wah sound, while the bridge pickup of your guitar will give the wah more of a quack. The bridge pickup seems to be able to produce a more vocal-like sound.
  • To make single notes have a “wow” kind of sound when you solo, pick the note while your foot is in toe-up position, and then quickly toe-down. The note will get that “wow” sound.
  • If you want different tones to solo with, turn your wah on and leave it in one position. You can get tones all over the map, from laid back and muted to bright and in-your-face.
  • Get some really cool wah tones when your amp is dirty. Putting an overdrive after the wah can help achieve this.
  • It want more of the vocal quality of the wah to come out, try using the wah during a more chilled-out section of the song, as many of these qualities are subtle and can be lost in a heavy mix.
  • Try using the wah for rhythm parts to get that underwater sound. This can be done by playing your rhythm normally, but rocking your wah back and forth slow and steady.
  • Experiment stacking your wah with other pedals. I really like to use it with a univibe.

Hope this helps you better use your wah pedal!

How to build a Guitar Pedal

A beginner’s guide by Guitarist, Jason Rooney. 

guitar pedal kitThere are many reasons one may choose to build their own pedal. Personally, I tend to be a very die hard DIY’er whenever I can get away with it, and I wanted to see if I could save a few bucks on some great sounding pedals by doing some of the dirty work myself. Whatever your reason, you will need a design or schematic to go by, a trusted source for your parts, time, and fair amount of patience. When I started my expedition, I had a fair amount of soldering experience and a basic understanding of circuitry and wiring. However, schematics looked to me like a message from an Alien race that I just couldn’t understand. I could find a lot of schematics of my favorite vintage pedals, but couldn’t do much with that information. Fortunately for me, I found a company that sold kits consisting of a printed circuit board, electrical components, an enclosure and all of the needed hardware. My first kit was a clone of a TS808 Tubescreamer. I must admit, it was a bit intimidating at first to open up the box and see a bunch of parts and pieces staring back at me and this would eventually become a pedal. The fear soon passed after I dug in and went to building. Having a circuit board with an outline of the parts on the board was very helpful when populating the board for the first time. I liken it a sort of painting by numbers. Find the spot and the corresponding part, solder, repeat. The wiring of the board to the hardware, jacks and pots, was very similar. Connect point A to point B, etc. I had particular fun when it came to painting the enclosure. This was a part of the pedal kit building that was mine all mine. After some paint and some drying time, it all went together for the moment of truth. Click… no sound. Click…. Nothing. I was so bummed. After chasing down all of my connections, in my haste I left one wire disconnected from the output jack – A simple fix. Now I was cooking with gas. The result was a great sounding clone of a pedal that would have cost me easily twice as much as this kit. Not to mention it gives me a great sense of satisfaction coupled with a splash of pride to know that I built that pedal I’m stomping on, this is a one of a kind, and I can do small mods to tweak and to my heart’s, or ear’s, content.

Getting started
There are a minimal amount of tools needed to start this journey, but some you may already have around the house. If not, you do not need to break the bank. As is with most things in life, I would urge you to buy the best you can afford at the time.

It is absolutely necessary to have a decent soldering iron. I would recommend an affordable iron that is around 25 watts and has a fine conical tip because you’ll be getting into some tight spaces. A reliable rosin core solder of small diameter is key. You won’t need a large amount, as a little goes a long way, but a standard spool will last a long time. Wire strippers are essential to peeling off the covering of the wires and exposing the bare wires to solder. Something to clip the leads of the components from the board. I

use fingernail clippers, but flush cutters work well too. Anything that can clip and get as close and parallel is what you’re after. Mistakes are inevitable and you will need a way to remove solder from the board or components. I suggest a solder bulb or de-soldering braid to remove solder. This will allow a clean and fresh area to re-solder the right part, or help when you want to swap something out for a mod.

Building the pedal takes time. Always have a reference of somekind nearby. This can be your layout, schematic, or instructions that accompany most kits. Don’t rush when soldering or wiring your pedal. If done right, your builds will provide you years of service. You are the builder and you are the quality control, this thinking may urge you to put in the extra effort that will make all the difference in the long run. Things don’t always work out 100% all the time. There can be bad solder joints, unexpected connections or shorts being made due to cramped space, and the occasional bad component, as well as a host of other problems often overlooked by the builder. There are plenty of forums of people discussing their builds and problems available for free online, so use those to your advantage for troubleshooting. I’ve also had great results contacting the companies I’ve ordered from.

When it comes to the enclosure, let your imagination guide you. This is your canvas and the face of your pedal to show the world. Just be patient when allowing your paint dry! I got ahead of myself a few times and have some fingerprints in my creations to prove it. Pre painted and powder coated enclosures are also available in a variety of colors and sizes from many sources if you aren’t too confident in your artistic abilities.

Starting out, building kits greatly helped ease me into the pedal building and modding world. Starting with very basic layouts helped me hone my soldering skills while learning what the parts were and how they went together. I first learned how to mod my kits and this knowledge carries over to any pedal. I now understand and can read schematics, find sources for parts, and I’ve learned how to etch my own boards based on different layouts or designs. With anything gear related, you can go as deep as you want.

How to get Controlled Feedback

jimi hendrix guitar on fireToday’s article will teach you how to get controlled feedback with your guitar. Nothing is more raw and show-stopping then a feedbacking guitar, screaming those hit notes at the audience. Feedback can be very unpredictable too, so we will not only talk about ways to get it, but also be able to control it. So lets get started..

Gear You Need
Lets start it off by outlining the necessary gear to get feedback in the first place. Of course an electric guitar (I like to use a strat). Then you will need a tube amp, though this could work with a solid state amp. Then you need a pedal that really pushes the amp hard. I like to use a fuzz pedal.

Setting the Amp
Getting feedback requires giving the amp some good volume. If volume is an issue for you due to your environment, you can get low-volume feedback if you also add a compressor pedal. Once you have a good amount of volume coming out of amp, the tone should be breaking up quite nicely. Not a sparkling clean tone, but a tone that has good sustain in notes and is dirty sounding.

Adding the Pedal
Throw your fuzz box into the mix and set it so it really pushes the amp. At this point, you should be hearing your guitar start to feedback a little bit on its own without really doing much.

Technique
Now when you are soloing, you want to hold notes and let them sustain as well as use vibrato while doing so. This should help turn the note into a feedbacking tone when it dies out. Picking two strings at a time while bending also produces different feedback octaves. Where your standing has a lot to do with it as well. If you are facing the amp, it will feedback with even greater ease. Point your guitar to the ceiling and it will give another kind of feedback. Experiment with your setup to get comfortable with it.

Controlling the Feedback
This is the hardest part of it as you don’t want to be feedbacking like crazy (or maybe you do) without much control of your own. So follow these tips to help you take better control:

  • Set your amp/fuzz pedal so that it feedbacks, but not easily. Rather it only feedbacks when you really do lots of vibrato. This way you can choose which notes you want to feedback.
  • Use your guitar’s volume knob when needed as it can help control an over-feedbacking guitar.
  • Use your whammy bar to bend the feedbacking notes.

Well there you have it. The more you experiment with it, the more you’ll be able to get the kind of controlled feedback that you want out of your guitar.

How to Select the Right Speakers

This is a Guest Post by Jazz Guitarist, Christopher Flynn

Celestion SpeakerPerhaps the most overlooked facet of guitar tone is the speakers your sound comes out of. Like any other item in a signal chain, speakers color your tone by altering the EQ, harmonics, and sound envelope of whatever is in front of them. Unlike other items in your signal chain,however, there is nothing “downstream” of speakers that can compensate or alter their coloration, their full effect is a always going to be a constant in your tone.

The famous producer Roy Thomas Baker (Queen) once said that “the secret to great sound is to understand where it starts for the listener and work your way backwards.” When it comes to selecting speakers, many guitarist may feel like they are swimming in an ocean of alphabet soup. If you are looking for speakers DO NOT worry that you have no idea what a FS, QES, or QMS is. You are a musician not a physicist. Any speaker company worth your time will have a readily available chart or graph showing you what kind of added EQ the speaker will provide for your tone. From there, you need to shift your perspective to thinking about your rig and your tone as a whole. Does your Les Paul, Fulltone OCD, Marshall Half Stack setup really need more Bass? Think about what kind of tone you have right now and what you may be lacking or have too much of. Speakers can be an excellent way of solving tonal problems that many spend thousands of dollars trying to fix. Want your Twin Reverb to sound different when overdriven? Try changing out the Jensen speakers with british inspired ones.

While you may not need a degree in physics to understand great speaker tone, there are several mechanical concepts that are vital to speaker selection and longevity. The most important of these is the Law of Ohms. Ohms are a measurement of resistance and mismatching Ohms can destroy your speakers and damage your amplifier. What kinds of speakers you can use with an amplifier and what mismatches are okay is complicated and depends on your specific setup. The best idea is to read your amplifier’s manual (don’t worry its probably online), do a little googling, and talk to professionals at a well qualified guitar shop in your area.

When selecting great speakers the best advice is to follow your ears. While boutique websites may disagree, money does not buy tonal satisfaction. Take your entire rig to your local guitar shop and plug into a variety of cabs, listening closely to how each one adds and subtracts from your overall sound. Every piece of gear in your set up changes how you’ll sound when you hit the studio, the practice space, or the stage.

How to Get a Good Blues Tone

This is a Guest Post by Guitarist and Published Author, Brian Reed.

BB King and Eric ClaptonWho hasn’t heard Albert, B.B. or Freddie King, Muddy Waters, Buddy Guy, or Eric Clapton and thought, “Damn, I want my guitar to sound like that.”

There is no blueprint for good blues tone. Since there are so many distinct blues styles, there are likely iconic bluesmen that have used a setup similar to yours. Blues legends have used single coil and humbucker-based guitars, tube and solid-state amps, pedals and just plugging straight into the amp. Here are some rules of thumb that can help you get good tone no matter your setup.

Great blues guitarists know just how to manipulate their guitars to get multiple different evocative tones. They use the pickup selection, tone and volume knobs on their guitar to change tone rather than changing channels on their amp or using a pedal.

If you have a dual humbucker guitar, familiarize yourself with the way the guitar sounds using both the neck and bridge humbuckers. Then, experiment with rolling off the volume and see how it impacts the sound. Some blues players have the volume on their neck pickup rolled back for rhythm and the bridge pickup volume all the way up for solos. Other players may have both volumes on full and use the neck pickup for slower, vocal-sounding solos, then switch to the bridge for more sustained, singing or trebly, biting solos.

For Strat-style guitars, listen with how the tone changes when you move between the five different pickup positions and the ways they can affect the emotional impact of a solo. Most Strat-style guitars don’t have multiple volume knobs to set different pickups at different levels, but you can still manually roll the volume back while playing rhythm and bring the level back for solos.

Dial your amp’s gain or volume so that when your guitar’s volume is set at 10, the amp has a nice singing sustain. Blues doesn’t typically incorporate over the top high gain, but you want a tone that has a nice vocal quality to it and that requires a little overdrive. If you don’t know where to begin, start with all the knobs at 12 o’clock and then you can adjust the gain up from there. Most tube amps sound best when the volume is pushed to create natural overdrive rather than adding distortion.

Pedals aren’t essential for blues but some players will add a touch of amp reverb or tremolo to their signal. However, more dynamic effects like delay, chorus or other modulation effects aren’t necessary.

Some players also use an overdrive or other type of boost pedal to push their solos to another level. There are hundreds of Tube Screamers clones, first popularized by Stevie Ray Vaughan, which can add a throaty, midrange voiced overdrive to your tone. Or, if you have a darker sounding amp, like a Marshall, you might look for a treble booster like the Dallas Rangemaster pedal similar to what Eric Clapton used with his Marshall Bluesbreaker. There are lots of boost pedals on the market that have transparent characteristics, but give a little extra push to the front end of the amp to enhance the sound.

Whatever your setup, it is important to remember that great blues tone is much more about feel and emotion than expensive gear.

How To Get A Good Country Tone

This is a Guest Post by Guitarist and Published Author, Brian Reed.

merle haggard teleIf you want a classic country tone, the equation is easy: a Fender Telecaster and a Fender amp. It’s the setup guitarists used to record the classic tones on all the old Johnny Cash, Merle Haggard, or Hank Williams albums. I could stop the article here, but I’ll throw a bone to players with more diverse setups. Fortunately, there is more than one way to nail the classic country tone and here are ideas to get you there.

Guitars

For guitars, the key is a low gain, single coil bridge pickup to preserve a clean tone with minimal distortion. Most humbucking pickups have too much gain and are too dark for the sharp pop and clarity necessary in country music. A good-quality Tele and Strat-style guitar in the bridge position with the tone knob in the full treble position work best, however, there are other potential options. Gretsch guitars with Filter’Tron pickups or even a six-string Rickenbacker both set to the bridge pickups can serve up ample twang that compliments the style well.

Amps

In amps, clean tone is important as well. A high quality single channel amp is sufficient or if you have a multi-channel amp, use the cleanest channel. There are scores of amps with Fender-style, 6L6 and 6V6-based circuits that can get the desired tone with little trouble, however many other country guitar players also use British-voiced EL-84 amps including the Vox AC30, Matchless HC-30, Dr. Z Maz series, and others. Dialed up clean, these amps have a snappy brittleness that is perfect for this style of playing. Their tube rectifiers also help compress notes on their own so a compression pedal isn’t necessary.

Dialing in the tone, think clean, bright, and punchy. Dial back the distortion as much as possible and push the treble and bass to close to max then dial them back to taste depending on the characteristics of your amp. The midrange is somewhat scooped, but the bass is important to give the tone a beefy fullness when riffing on the low E string.

Effects

Adding reverb, compression, and delay can all enhance the basic country tone attainable from the guitar and amp. If your amp has a built-in spring reverb, adding a touch of reverb can really add dimension to the tone. However, use reverb sparingly as too much can swallow your notes and the clarity of your playing will suffer.

Compression helps smooth out uneven notes, fattens tone, and adds a glassy almost hi-fi sheen that is reminiscent of steel pedal guitar. It will come in handy for players who are new to country techniques like snapping and popping. Compression will dampen inconsistencies and maintain an even volume and dynamics in all the notes. Additionally, compression can help increase sustain that may be lost using the cleaner settings of your amp.

Adding a quick slap back delay can add dimension and depth to your sound. Setting a digital delay to a 100 milliseconds with one or two repeats should work well. Again, use delay sparingly as longer delay times and more repeats clutter the sound.

More than anything, great country tone comes from superior technique. So, don’t stress over gear. Get the best guitar and amp you can afford, plug, play, and have fun.

How to Get a Good Jazz Tone

This is a Guest Post by Jazz Guitarist, Christopher Flynn

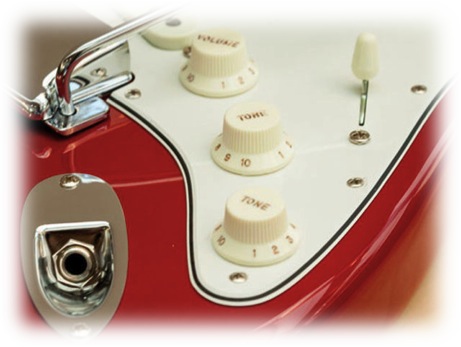
When it comes to jazz tone, nothing replaces proper technique and quality phrasing. Jazz tone is as much about the sound of the chords and strumming as it is about having the proper guitar, EQ settings, and speaker choice. In spite of this disclaimer, I must admit that you will find it hard to play like Wes Montgomery with a Schecter Hellraiser through a Mesa Triple Rectifier. However, you do not need to spend your life savings on a vintage arch top from the pre-war era to get that infamous jazz sound. The sound of jazz guitar is usually defined as having a rounded envelope, similar to a piano, instead of a sharp attack decay cycle, as in country music. While the common choice in a jazz guitar is a semi hollow or hollow body guitar, such as a Gibson L5 or an Epiphone Sheraton, solid bodies have been commonly used in jazz fusion and modern jazz genres. The trick to getting that rounded attack from such a guitar is to use the neck pickup and roll off the tone knob to cut the cut some of the high end spike. The rounded sound of jazz comes from a curve in the higher frequencies of the guitar. On an acoustic or hollow body electric, these curves come very naturally due to the construction and acoustic resonance inside of the guitar body itself. On a solid body, the higher frequencies are not able to soften and often become harsh. This issue, however, is completely manageable via the guitar’s tone knob and amplifier settings. On the road currently, I use a Mexican Stratocaster with Harmonic Design pickups and receive compliments from old jazz professionals about my tone all the time.

Jazz tone is often described as a “clean genre” and having a great clean sound is crucial. When I started playing in jazz clubs, I was told by countless professionals that I needed various boutique amplifiers that costed the same amount as my car in order to get authentic jazz tones. After years of playing, and a lot of wasted money, I realized that the secret to great jazz tone lies far more in how the amplifier is set. Any amplifier with a great clean sound can garner a great jazz tone. By pulling back the treble, boosting the bass, and rolling your mids to taste, the classic jazz tone can be found in almost any amplifier. As a jazz player, the gear that you’ll have to rent or get backline at a show will likely be a standard amp that did not cost a lot of money. I have been stuck with a JCM 2000 on multiple occasions. Developing your ear and ability to dial in an amplifier will give you the ability to get great tone through almost any system.

Effects are a subject many veteran jazz players shy away from. The truth is, you do not need any effects to play great jazz music, but that does not mean you can’t bring out your pedalboard. Jazz music loves experimentation and combination with various musical genres. I have seen phasers, choruses, delays, even fuzzes and distortions in professional jazz sets. While great guitars and clean amps are certainly an excellent basis for jazz tone, feel free to experiment with whatever you want to. Follow your ears, not what the internet or some guy at a guitar shop says.

The Best Chorus Pedals on the Market

Today’s article will focus on the best chorus pedals available. Nothing beats that lush, warm, watery, organic chorus that makes you feel like you’re floating. Finding the right chorus however is no easy task as there are many on the market that sound 2-dimensional, and having issues such as volume-drops. So lets take a look at the some of the best chorus pedals.

AnalogMan Bi-Chorus

No secret that AnalogMan has long created some of the best boutique pedals available. The Bi-Chorus is no different, creating a very pure and warm chorus. What’s really unique about the Bi-Chorus is that there are two speed controls and two depth controls along with an A/B switch. The benefit is that you can have two different chorus sounds set to your liking that you can switch between on the fly just by stomping on the A/B switch. I find this to be a great feature as you may want your solos to have one kind of chorus sound and your rhythm parts to have another. AnalogMan has long been known to allow customizations. The Bi-Chorus has an option to add an extra output for true stereo. Definitely a great pedal.

MXR Stereo Chorus

This made the list simply because it is the most cost-effective stereo chorus available! As well, Slash uses one to add even more mojo. A great feature of the Stereo Chorus is that there are separate EQ controls (Bass, Treble) allowing you to really shape the chorus exactly to your liking. As well with controls for speed, intensity, and width, this pedal really gives you unlimited tonal possibilities. With this amount of control, it can work well with any pedalboard. View the MXR Stereo Chorus on Amazon.

Effectrode Vibralux Tube Chorus

Made with real tubes, this all-analog chorus is undoubtedly the most organic sounding of them all. It gives that pure warmth that only real tubes can give. In some ways, it may be perhaps closer to a univibe, but it still gives some of the best chorus tones we’ve heard. This makes the list as being the most organic and pure-sounding chorus.

Red Witch Analog Empress Chorus

The Red Witch is a very deep and lush sounding chorus. It was something we noticed right away upon hearing it, that it just sounded really sweet to the ears. The Empress Chorus has a lot of controls to really tweak the sound, though it sounds great at just about any setting. The controls include a voice switch (chorus/vibrato), Mix dial (between chorus and clean), velocity, depth, and a bright switch. As well, there are dual outputs for playing in stereo between two amps. That’s how you really get a chorus with a lot of depth! View the Red Witch Analog Empress Chorus on Amazon.

Other Great Chorus Pedals on the Cheap

TC Electronic Corona Chorus – True Bybass, and sounds great!

MXR Analog Chorus – All analog and lots of controls for tweaking.

Electro-Harmonix Small Clone Chorus – No frills, but great analog chorus tones. Was used by Kurt Cobain.