Marshall AFD100 Slash Signature Amp Review

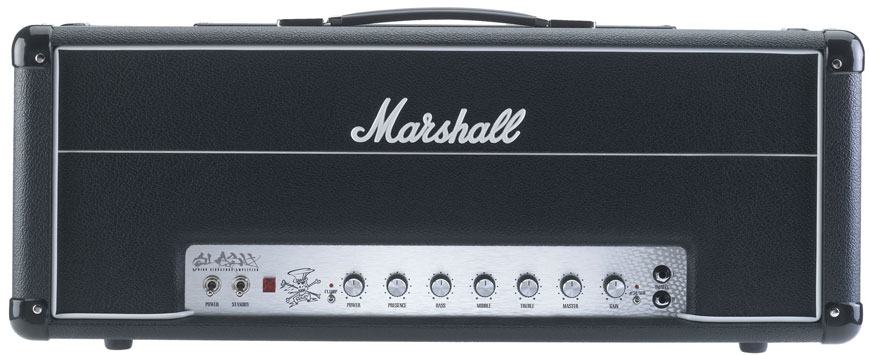
A man of juggernauting guitar hero stardom, Slash needs very little introduction. The top-hat wearing, Les Paul toting, leather clad icon has been long synonymous with Marshall amplifiers, most noticeably being the first artist to ever receive a signature model in the form of the JCMSlash. Although the AFD100 is the second instalment of a Slash model amplifier, it offers something far different to its predecessor in the sense that it aims to encapsulate one of the most legendary guitar tones ever recorded. The sound of Appetite for Destruction.
Marshall AFD100 Slash Signature Amp Review

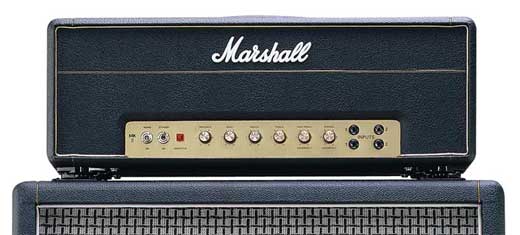
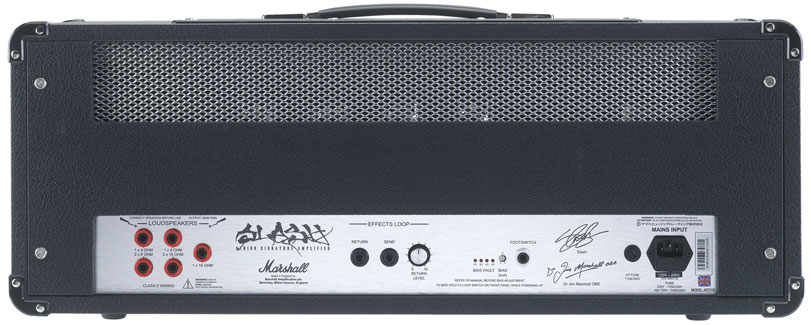
To many, this amp is danger of sounding a tad like a one trick pony, though that’s not actually the case. The 100w head boasts two different voicings, with one based on ‘appetite’, while the other is based on Slash’s later tones. In this reviewers opinion the amplifier is an absolute stunner. Paying homage to the two amps the AFD100 is based on (a modified 1959t and a modified JCM800), the head boasts the width of a JCM800 chassis, the depth of a JTM and height of a JMP. The silver faceplate also adds a nice tilt of the head towards the Silver Jubilee heads that have featured in Slash’s rig since the late ‘80s. Other than the slightly large Slash graphic and snakeskin hologram adorning the front of the faceplate, the amplifier could easily be mistaken for a late ‘70s JMP with a silver faceplate, complete with vintage style switches. Among other features, the amplifier is supplied with a footswitch, a footswitchable fx loop, self-biasing and a power scaling control. Although the footswitch and fx loop are nothing out of the ordinary, the self-biasing and power scaling controls really are something to jump up and down about. Easy and functional in use, the self-biasing feature is activated by pushing the fx loop switch and power switch at the same time. By adjusting a short knob on the back of the amplifier, one can select the voltage at which the amplifier is biased. In use, this feature works rather well and is in actual fact rather speedy, taking only a few seconds to adjust the bias of the head.  On the other side of things, the power scaling control is designed to act similarly to an inbuilt attenuator, scaling the amplifiers output from 100ws all the way down to 0.01w. The reason for this is, as anyone that’s owned a 100w head will tell you, to get a real raunchy rich tone, both the pre-amp and power and tubes need to be gunned. Although the AFD100 features a master volume control, cranking both the gain control and MV together and scaling back with the power control allows the player to access a beautiful, singing, harmonically rich sound at neighbour or small venue friendly volumes. In fact, in my opinion this is one of the most attractive features of the amplifier.

Marshall-AFD100-Slash-Signature-Amp-Review---back

Tone.

Plugging into the first input of the AFD (the second is attenuated by 6dB) and playing through the no.34 mode, you are immediately greeted by a sweet, tight trebly sound, reminiscent of Slash tracks such as ‘Locomotive’ or ‘Back to Cali’. There’s plenty of gain on offer here, and the amplifier genuinely feels a joy to play. Somehow sounding tight but feeling loose, the head responds exceptionally well to pick attack. The EQ adjusts nicely, though to be honest anything within the 5-7 ballpark on all the knobs is a big hit. Some may have a few concerns with the amount of top end when running through the no.34 channel, as the amp is rather tight and biting here, though a bit of tweaking with the presence and treble knobs should provide more than enough tonal variation. Moving over to the amplifier’s namesake sees the head really come to life. The AFD channel is bright, warm, hot and raunchy. The sound fills out excellently, and leads literally fly off of the fret board. Pinched harmonics are a breeze, while pick attack and definition are still prevalent. For those concerned with the appetite sound, there’s nothing closer to the mark. Paradise City, Nightrain, Mr. Brownstone, they’re all here. The neck pick-up is plumby and gorgeous, and the bridge pickup rousingly fierce. Rolling down one’s volume knob or the gain on the amplifier really provides the player with a great vintage Marshall sound. Think Jimmy Page’s mid-70s live tone. Single coils also sound rather fat on the AFD channel, much like Blackmore or Malmsteen. However, those looking for an amplifier with a designated clean channel should be warned, although the AFD100 is a lion of a Hard Rock amplifier, achieving a clean tone takes a fair amount of tweaking that makes switching between clean and dirty sounds a difficulty. Nevertheless, those that are happy to role back their guitars volume controls for their clean sounds should be chuffed to pieces with how well the AFD100 responds to a guitars controls.

In conclusion, anyone looking for an amp with both great dirty and clean sounds, should look elsewhere. However, for anyone looking to capture the appetite sound, or to purchase an amp that has a truly almighty Rock n’ Roll tone there’s scarcely much better. Besides being an amp that recreates one of the most sought after guitar tones of the last twenty years to a tee, the AFD100 is truly just a great, great Marshall amplifier.

Large vs. Small Amplifiers – Is bigger always better?

This is a guest post by James Abel

Both large and small amplifiers have their benefits, whether it is portability, headroom or just plain ‘mojo’ it’s safe to say that both stand up strong in the battle of the elephant vs. the mouse. With that said, the pendulum also swings the other way, with both having their shortcomings. This article looks to host the sparring match between the two, by taking a look at both the pros and cons of each kind of amplifier.

Going large:

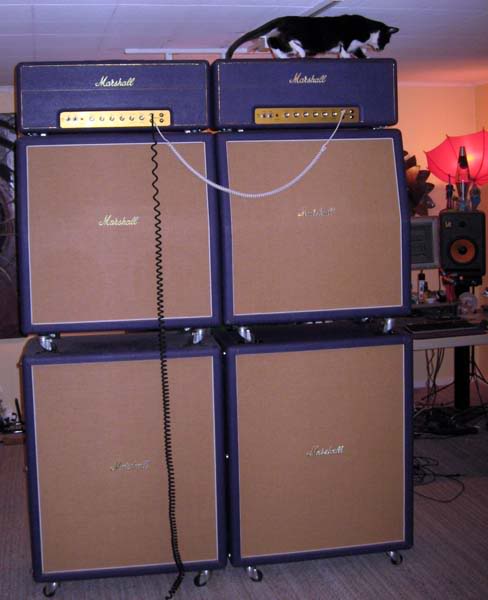
Marshall Superlead Double Stack in purpleWhether it’s the visual effect, or the colossal trouser flapping oomph that it exudes, I’m sure most would agree with the notion that a wall of amps is seriously cool. Similarly amplifiers like a 100-Watt Marshall atop a 4×12, or a large combo like a Fender Twin reverb, possesses a certain comforting characteristic. For example, anyone that has gigged with one of the amps mentioned above can rest assure that they are head in the mix, while maintaining the integrity of their tone. Furthermore, higher wattage amps tend to allow more headroom than their low wattage cousins, providing another argument for why big is better. However, large amps do have their drawbacks. For one, today’s gigging climate doesn’t always require a loud, unruly brute of an amplifier that’s going to rip the head off the first three rows of an audience. Ok, so the hard rock and metal heads like myself out there may not agree with this, as there is nothing quite like the feeling of your amplifier moving air. However, most sound technicians tend to prefer it when you run your amp at a lower volume, and instead use a mic to get the projection and volume that is required for live use. On top of that, some high wattage amplifiers are not always suitable for use in the home; any of you with angry neighbours are probably already aware of this problem though. In some instances portability is a definite issue. Carrying a large combo up and down the stairs of a small venue is certainly not the most enjoyable of tasks, especially when the temperature of the venue feels like a furnace. Yet, this does generally seem to be more of a problem with combos than with heads, as most venues supply their own cabinets. However, the obvious issue with that is that you’re often made to jeopardise your tone in a bid to encourage functionality. Still, regardless of all of this, many of us still persist with using big amplifiers. Whether it’s the tone we can pull from them, the sheer thrill of the appearance, or just because there are more options in the market, there is something extremely exciting about using a large amplifier. With that in mind, I don’t see their popularity dwindling any time soon.

Little monsters:

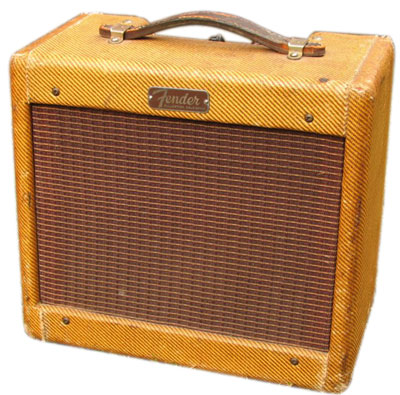
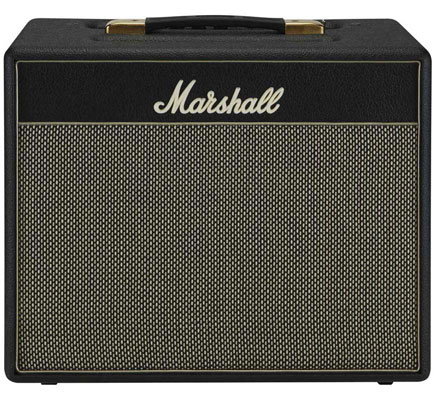
On the other hand, the popularity of smaller amplifiers seems to be increasing. The first obvious benefit of using a small amplifier, for example the Marshall class 5 recently reviewed on here, is portability. Carrying your amplifier to a venue becomes a much simpler and more functional task, and with the likes of Marshall, Blackstar, Vox, Fender and many more offering single speaker combos, there is enough variety to satisfy pretty much every faction of player. Another benefit of using fender-tweed-champ-vintagea small amplifier is that they really can be pushed. Whether it’s an overdrive, a boost or just the volume control used, a small valve amp at full tilt truly gives off a magical sound. Small amps are also fantastic for recording both at home, and in the studio. Tracks such as Layla, or albums such as Zeppelin I stand as a worthy testament to this. Versatility is hardly a problem here either, with companies such as Blackstar and Laney offering multi-channel low wattage amplifiers. However, much like before, there are some shortcomings of the pipsqueaks of the amplifier world. Volume can often be an issue, as although most of the low wattage amplifiers on the market can provide a hefty right hook, many actually struggle to climb over the top of a drummer. Furthermore, although the volume of the amplifiers can’t always compete in a band without a microphone, they’re often surprisingly too loud for use in the home. Thankfully, many companies are aware of this, and do provide a low wattage option on their little monsters. Another problem with using a smaller amplifier is that many sacrifice speaker quality in a bid to make the amplifier more affordable. However, if you are privy to vintage or boutique gear then this is less likely to be a problem. Besides, as mentioned earlier, most venues supply an external speaker cabinet that can always be paired with a smaller amplifier providing it has an external speaker output.
In Conclusion:

As is the way with everything in the world of guitars, choosing a large or small amp is simply down to a matter of opinion. It’s obvious that both have their Pros and Cons, and it truly is a matter of what ticks your boxes. Yet when push comes to shove, both are wonderful and excellent in their own rights, and should certainly be giving equal measures of respect and use.

Marshall Class 5 Review

Marshall Class 5 ReviewWe recently acquired a Marshall Class 5 amplifier that we are going to review for you today. So lets not waste any time and get right to it!

Features

So we are looking at a 5 watt combo, which is the one we have, though it also comes in a head format. It would seem the intent is to be used as a practice amp/low volume jam rig as you definitely won’t be able to keep up with a drummer, thats for sure. The amp is all tube with a pair of 12AX7s in the preamp and a single EL84 in the power section. I have yet to experiment with different tubes, but I do have a NOS Mullard 12AX7 that I will try in it and update this post when I do. The speaker is a 10-inch Celestion G10F-15, and the controls are quite simple: Volume, Treble, Middle, and Bass.

Marshall Class 5 Controls

Sound

When I first turned the Class 5 on, I was quite surprised by the tone. It sounded quite good and the cleans were not at all bad either. I used a Fender Stratocaster 1968 reissue. The sound is definitely more of a classic tone, rather than the high-gain Marshalls of today. Like most Marshall amps, the Class 5 definitely has a good midrange with fat-sounding notes in both the bass and treble strings. You can get some decent Hendrix and Clapton tones, though not incredibly authentic or anything. Once you reach about half open on the volume, that is about as loud as the amp gets. If you continue to raise the volume dial, the tone gets more distorted. I wasn’t too impressed with the distorted tone and found that with a fuzz pedal, the tone wasn’t very good sounding… a bit too ear-piercing and like a weird kind of noisy sound where it is tough to get clarity of notes. I found the best setting volume-wise was to have it between half open and a little above to get a sort of pushed-cleans kind of sound. I tried running a univibe and a wah pedal through it, both of which sounded pretty good. I could see this amp sounding much better if it were fed through a cab with great speakers.

Overall

If you are looking for an amp to have at home without being too loud to get a good tone, the Marshall Class 5 is definitely a great choice. As well, if you want more of a classic Marshall tone, the Class 5 is it. Great for nice low-volume jams at home with friends. Do not get this as a gigging amp, thats for sure, unless of course you are gonna mic it heavily. All in all, a good amp that I’ll be keeping with me.

View the Marshall Class 5 on Amazon.

Vox AC15C2 Review

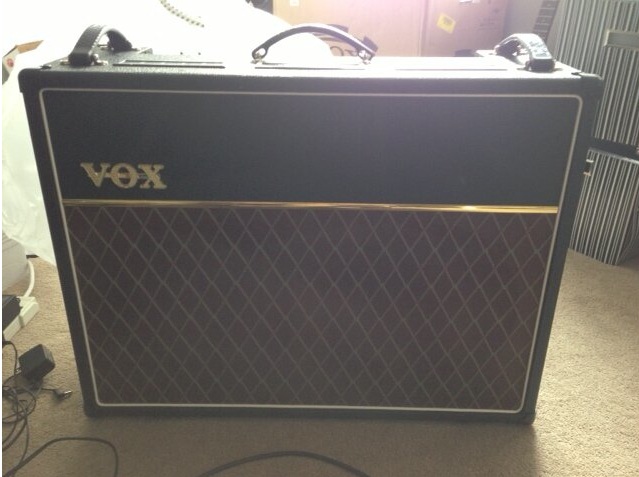
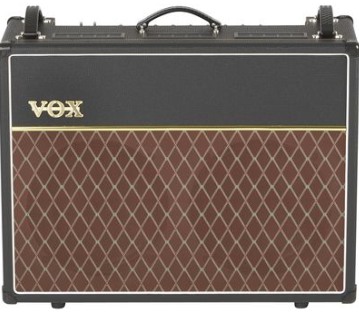
Recently we acquired a new Vox AC15C2 Twin Custom. This is a 15 watt amp, loaded with 2 Celestion Greenback speakers. The amp features a normal channel, and a top boost much like the old ’60s Vox amps. Included are reverb and tremolo to add some different sounds to the mix. As well, this is a master volume amp, allowing you to push the pre-amp tubes at lower volume.

vox ac15c2
Vox AC15C2 Twin Custom

My first impressions of the amp was that I was able to get a nice tone, clean or dirty, and at a reasonable volume for either. So flexibility is a great feature of this amp. Another first impression was just how heavy this amp is. I’ve already had the opportunity to gig with it, and it is a bit of a pain. But I suppose you got to expect that with a 2X12 combo.

What initially attracted me to the Vox AC15 Twin Custom was the Celestion Greenbacks. The result is close to the classic Vox chime, but when overdriven, it is more of a smooth Marshall roar reminiscent of a Marshall Plexi. Just the kind of overdrive I love. The benefit of the two speakers is a nice fat and full sound. One thing I hate (personally) is when my tone is thin in the solo sections. Doesn’t happen with this amp as you can dial in very thick sound.

As the speakers broke in, I still found myself not totally in love with the tone I was getting (I’m very picky!). There was still a bit of ear piercing highs, and muddy lows. When I took a look inside the amp, I saw that they were just using cheap Chinese-made tubes. I decided to put a NOS Mullard 12AX7 made in 1966 in V1 of the pre-amp section. Once I did, the difference was huge. Much more warmth, less ear-piercing, and more musical sounding. Definitely was starting to feel some of that vintage Vox tone. Can’t wait to change put some NOS tubes in the other pre-amp slots and some NOS power tubes.

The Reverb is actually pretty good on this amp, though I would have liked if there was more than one control for it to really be able to shape it to taste. That being said, it is a large reverb tank (found in the AC30) since there’s room in the twin cab. So you can get a whole lot of verb and cop some nice surf tones.

The Tremolo is a nice little addition. With controls for speed and depth, you can dial it how you like. I like to turn the speed up and dial just a hint of the actual effect to add an extra bit of sparkle to chords. Would love to try it with a Rickenbacker!

All in all, for $799, this amp is a good deal and I am quite happy with it. It has a good sound, with touch sensitivity, and is extremely flexible to accommodate a wide variety of tones.  I definitely recommend it.

View the Vox AC15c2 on Amazon.

How to Select the Right Speakers

This is a Guest Post by Jazz Guitarist, Christopher Flynn

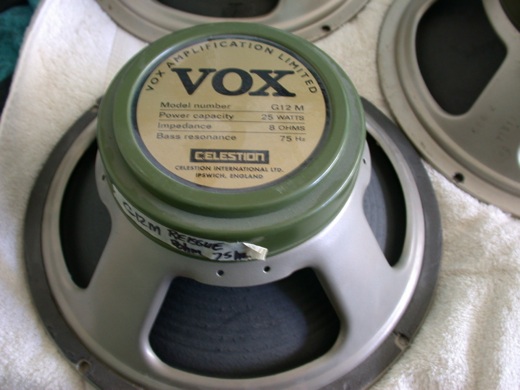
Celestion SpeakerPerhaps the most overlooked facet of guitar tone is the speakers your sound comes out of. Like any other item in a signal chain, speakers color your tone by altering the EQ, harmonics, and sound envelope of whatever is in front of them. Unlike other items in your signal chain,however, there is nothing “downstream” of speakers that can compensate or alter their coloration, their full effect is a always going to be a constant in your tone.

The famous producer Roy Thomas Baker (Queen) once said that “the secret to great sound is to understand where it starts for the listener and work your way backwards.” When it comes to selecting speakers, many guitarist may feel like they are swimming in an ocean of alphabet soup. If you are looking for speakers DO NOT worry that you have no idea what a FS, QES, or QMS is. You are a musician not a physicist. Any speaker company worth your time will have a readily available chart or graph showing you what kind of added EQ the speaker will provide for your tone. From there, you need to shift your perspective to thinking about your rig and your tone as a whole. Does your Les Paul, Fulltone OCD, Marshall Half Stack setup really need more Bass? Think about what kind of tone you have right now and what you may be lacking or have too much of. Speakers can be an excellent way of solving tonal problems that many spend thousands of dollars trying to fix. Want your Twin Reverb to sound different when overdriven? Try changing out the Jensen speakers with british inspired ones.

While you may not need a degree in physics to understand great speaker tone, there are several mechanical concepts that are vital to speaker selection and longevity. The most important of these is the Law of Ohms. Ohms are a measurement of resistance and mismatching Ohms can destroy your speakers and damage your amplifier. What kinds of speakers you can use with an amplifier and what mismatches are okay is complicated and depends on your specific setup. The best idea is to read your amplifier’s manual (don’t worry its probably online), do a little googling, and talk to professionals at a well qualified guitar shop in your area.

When selecting great speakers the best advice is to follow your ears. While boutique websites may disagree, money does not buy tonal satisfaction. Take your entire rig to your local guitar shop and plug into a variety of cabs, listening closely to how each one adds and subtracts from your overall sound. Every piece of gear in your set up changes how you’ll sound when you hit the studio, the practice space, or the stage.

What’s the Point of Point-to-Point?

This is a Guest Post by Bruce Clement of BC Audio

I am often asked why I use what I refer to as true point-to-point wiring in my amps. Why go through the extra work? Does it really make a difference in the sound? While point-to-point wiring is certainly not the only path to great tone, I’d like to address some of the questions surrounding the topic and explain why point-to-point wiring is important to me.

Q: What do you mean “true point-to-point” wiring? Aren’t most vintage and boutique amps point-to-point?

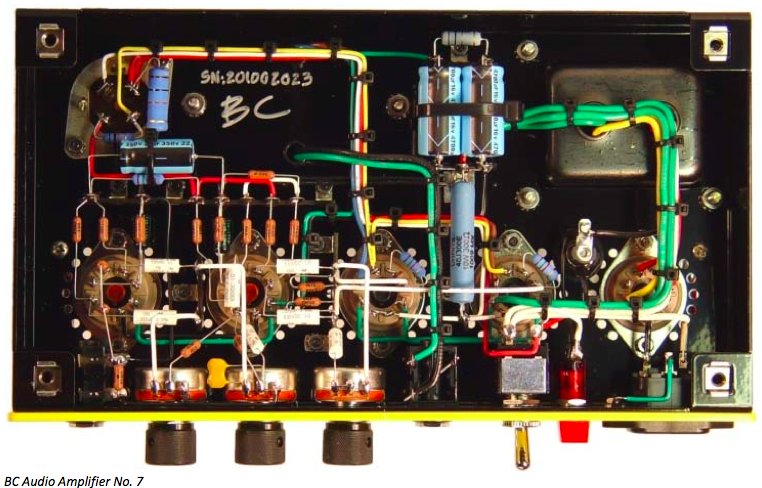
A: Long before the invention of the printed circuit board (PCB), when eyelet boards and turret boards were new advances, the term point-to-point referred to the then common method of soldering small electronic parts (such as resistors and capacitors) directly to chassis-mounted parts (tube sockets, jacks, pots). “Point-to-point” meant the resistors, capacitors and wires in the amp connected one point to another, without a board of any kind.

With the resurgence in popularity of vintage amps – most of which were built using turret or eyelet boards – many people began to refer to those amps as “point-to-point.” I believe this error occurred because people were trying to make a distinction between what you see in vintage amps – and the boutique amps that copy them – and the PCBs found in modern mass-produced amps. Thus, “point-to-point” came to mean “anything other than PCB.”

There certainly is a distinction to be made between eyelet or turret boards and PCBs. But, the misapplication of the term point-to-point to these board-based construction methods has resulted in a loss of its correct meaning. That’s why I have taken to saying “true point-to-point.” It’s not that other methods are less “true” to some ideal, but that the original meaning of point-to-point has been lost. To their credit, many manufacturers today are using terms like “hand wired” to describe their turret board or eyelet board amps.

Q: What does this mean in practical terms? What’s the difference?

A: Let me point out the primary difference between board-based and point-to-point construction: wires.

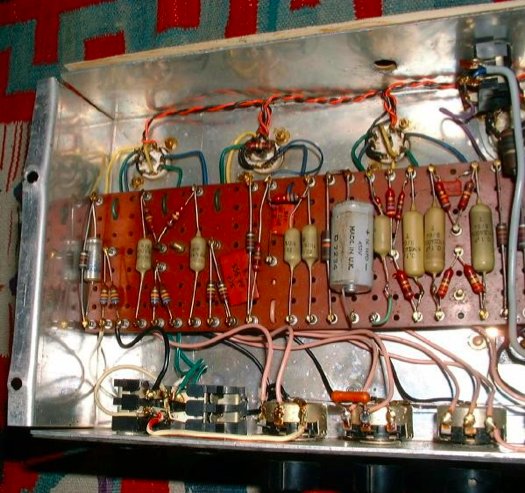
Marshall JTM50 (Flag Logo), circa 1967, turret board construction

In a board-based tube amp, such as a vintage Fender or Marshall, many wires connect the parts on the board to the chassis-mounted tube sockets, jacks, pots and other parts. Any signal-carrying wires running from one place to another have the potential for the introduction of a myriad of problems: noise, interference, crosstalk, coupling, parasitic oscillation, unwanted capacitance and instability. That’s why lead dress – the way wires are arranged and managed throughout an amp – has always been such a huge factor in tube amplifier design.

With point-to-point wiring, many of these wires simply don’t exist.

For example, let’s take a look at the most sensitive, vulnerable part of any amp – the place where the problems mentioned above can have the most detrimental effect: the input to the first gain stage, where the guitar signal first reaches a tube. Whatever problems get introduced here are amplified and re-amplified throughout the rest of the amp.

In a board-based amp, a wire runs from the input jack to the board, where it connects to a turret or eyelet. A resistor is mounted between that turret/eyelet and another one. From there, a second wire runs to the tube socket. Each of these two wires is likely to be several inches long, and located physically close to other wires that carry amplified signals, B+ power, heater power or other currents. This type of arrangement is repeated again and again – at each gain stage, each front panel control, each part of the signal path.

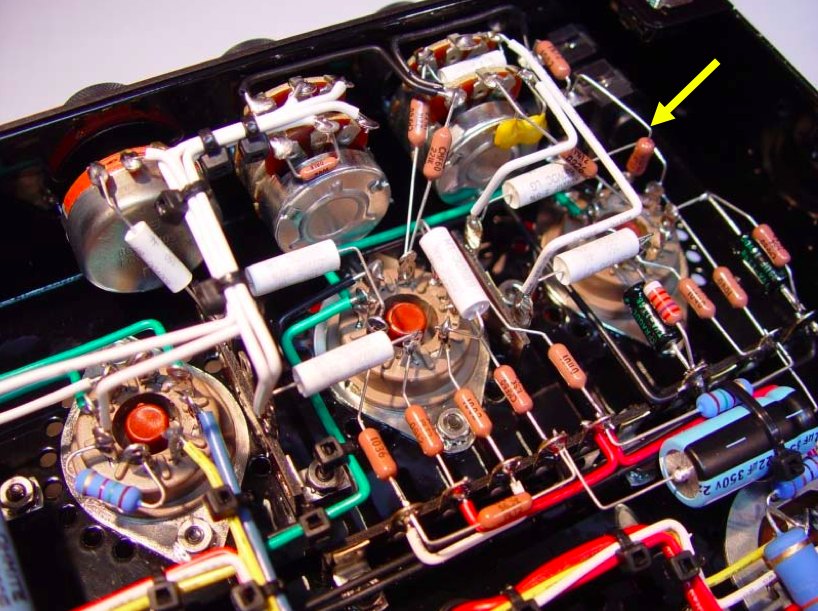
Now, consider the input to the first gain stage in BC Audio’s high-gain 25w Amplifier No. 8. The input jack is connected to the tube socket by a resistor alone (arrow in photo). There is no wire between the jack and the resistor, nor is there a wire between the resistor and the tube socket.

BC Audio Amplifier No. 8, arrow points to grid resistor of first gain stage

This technique is carried on throughout the circuit. There are only a few very short signal-carrying wires in the entire signal path. Other wires safely carry B+, heater and other currents some distance away from the sensitive areas of the amp.

Q: Isn’t point-to-point wiring messy?

A: This particular criticism is one that I happen to agree with. Traditionally, point-to-point wiring is messy! There’s an old yarn, “If you can see the tube sockets, it’s not point-to-point.” I’ve seen many circuits like that, with parts overlapping other parts at every angle, several layers deep, a veritable mish-mash of electronics so haphazard-looking that it’s a wonder the thing even works!

Well, I don’t like that kind of mess any more than anyone else. That’s why I’ve developed a different approach to point-to- point wiring. I have laid out parts along clean, parallel and perpendicular lines wherever possible. Wires are neatly bundled together – but never are sensitive signal wires bundled with power wires. The entire layout is designed to provide a very compact and direct signal path.

Q: Is there a difference where it really counts – in the sound?

A: I’ll leave it up to you and your ears to decide if the guitar tone itself is better or not. But consider the result of nearly eliminating the source of the problems I outlined above – noise, interference, crosstalk, coupling, parasitic oscillation, unwanted capacitance and instability. Without all that junk, you can hear and feel every nuance of your playing – and so can your audience.

I am convinced that a compact and direct signal path translates into greater clarity, more lively dynamics and a more organic feel, where the touch of your fingers on the strings feels more connected to the sound coming out of the speakers. Like I said earlier, point-to-point wiring is not the only way to make a great sounding amp. But I do believe that true point-to-point wiring, done right, makes a difference.

Best Marshall Amp

Finding the best Marshall amp is easy. All you have to do is look at some of rock’s greatest guitarists and see which Marshall they use. But nevertheless, we are making it easy for you by letting you know which Marshall amps we think are the best. We’re gonna break it down into categories..

Best Marshall Head
The award for best Marshall head goes to the Marshall Plexi Superlead. Used by the greats such as Jimi Hendrix, Jimmy Page, and Eddie Van Halen, this amp is sure to be number 1, quite possibly of any amp ever! The most ideal would be a late 60s’ model. Amp makers such as Metropolis and Germino do a good job at recreating these amps during that era.

Best Marshall Combo
The award for best Marshall combo amp goes to the Marshall Bluesbreaker. This amp is a beast, and was used by Eric Clapton in the early years. Lots of Marshall tone, with transportation being much easier than a half stack.

Best Marshall Cab
The best Marshall cabinet is hard to say, since it depends on the speakers loaded. As for the cab itself, we like the old basketweave and pinstripe cabs. Not easy to find today.. luckily Metro Amps offers both. As for speakers, we like the old pre-rola Celestion Greenbacks. Smooth creamy goodness!

Best Home Marshall Amp
For the lower wattage, home-friendly Marshall amp, the award of course goes to the Marshall Class 5. A great little amp with lots of tone. Half way up the dial gives nice cleans, and cranked gives that signature Marshall rock tone.

Well there you have it, the best Marshall Amps by category.

Amp Settings

How to Adjust your Amp Settings for the Guitar Tone You Want

So you finally have a great guitar and amp, but are still trying to figure out how to dial it all in to achieve the tone you want. There are a lot of factors to consider when configuring your amp settings, so lets start with the basics.

Benchmarking

One of best ways to shape your tone is to set the amp to equal settings. To do so, just set your bass, treble, mids, and presence to 12 o’clock. At this point, you want to start playing your guitar for a bit and get a feel for the tone that you are hearing with the ‘benchmark’ settings. At this point, you’ll start to hear whats missing. If its sounding like the guitar is lacking low end, increase the  bass. If its sounding ice-picky or ear-piercing, turn down the treble and increase the mids. The great thing about this method is that it builds your ear for EQing. This is a great skill to have as dialling in tone will become easier over time.

Clean Tone

To dial in a good clean tone, there are a few things to consider. First, if your amp has multiple channels, make sure you are on the clean channel. A no brainer, but still needed to mention it. When it comes to eq-ing, make sure that your bass, mids, and trebles, don’t proceed 1 o’clock. The reason is that around this point, it will start boosting the signal, and distorting the tone. Another thing to mention is your guitar itself – if it is sounding a bit distorted when your guitar volume is all the way up, roll it back a bit to clean up the tone. Also a light pick attack will make the tone cleaner as well.

Dirty Tone

Just the opposite of the last paragraph. If you have a two channel amp, set it to the dirt channel if it has one. Turn the presence, bass, mids, and treble about 3 quarters up to boost the signal, and increase/decrease as necessary. If you are playing on a tube amp, the hotter the tubes, the dirtier the tones. To get those tubes hot, it means cranking the amp really loud. Also again, a stronger pick attack with your guitar will dirty up the tone.

Setting Reverb on the Amp

I usually say, set the reverb to taste. For a good clean tone, having reverb between 9 and 12 o’clock sounds great. For a dirty tone, I would skip the reverb, or just put a touch. For a jazz tone, put the reverb either 3 quarters up or all the way up. If you are looking for a sound-scapy, mesmerizing, dream tone, then turn the reverb up. If you are looking for a more in-your-face tone, turn the reverb down.

Final Tips

  • Use your ears. They are the best judge of tone.
  • If its a tube amp, let the tubes warm up. And give it a bit of volume for better tone.
  • Two channel amps allow you to go from clean to dirty with a foot switch, so you can do it on the fly.
  • Try using some pedals to dictate the tone you want. (i.e. Clean Boost, Overdrive, etc.)
  • Practice technique.. as they say, most of the tone is in your hands!
I hope these tips on amp settings help you to get your desired tone!

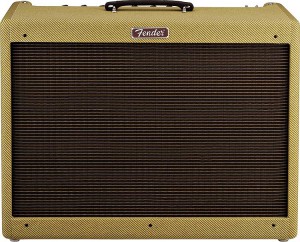
Fender Blues Deluxe Amp Review

So I was able to pick up a used 90s’ made Fender Blues Deluxe for about $500. I had tried out this amp about 5 years ago at Steve’s Music in Toronto and really was impressed with the clean tones it produced.  Now that I have owned one for a few months now, I can give it a real review. And if you are looking for sound clips, I made some, just scroll down the page.

The Blues Deluxe is a 2-channel amp with lots of controls for EQing included a presence and reverb control. So there is a lot of variety to shape your tone for the tweakers out there. It also takes pedals pretty well.

The reverb on the amp is very very nice. However, if you are playing with a lot of overdriving effects, I would set the reverb really low or off completely for the best outcome.

As for Pedals, I tried the amp with my Teese Picture Wah which sounded quite nice. My favorite was using a combination of my FoxRox Aquavibe and Earthquaker Devices Organizer. Got some very trippy sounds this way.

Back to the amp itself, once you start cranking the clean channel, thats when the tone really starts coming in. The clean channel sounds much much better than the overdrive channel. So I would suggest using pedals on the clean channel if you want the amp more dirty.

Overall, I’m quite pleased with the amp for the price. It has a good sound, can definitely hold its own with a drummer at 40 watts. I can wait to experiment with different speakers/tubes to get it more to my liking! View the Blues Deluxe on Amazon.

Fender Blues Deluxe Sound Clips:

Blues on a Fender ’68 Reissue Strat