How to get Robby Krieger’s Guitar Tone

Robby Krieger, legendary guitarist of The Doors is known for some of the most memorable guitar playing of all time. Who could forget his great solo on Light My Fire or his eerie eastern-inspired playing on The End. Lets take a closer look at how he achieved his signature sound.

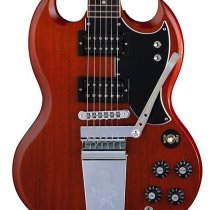
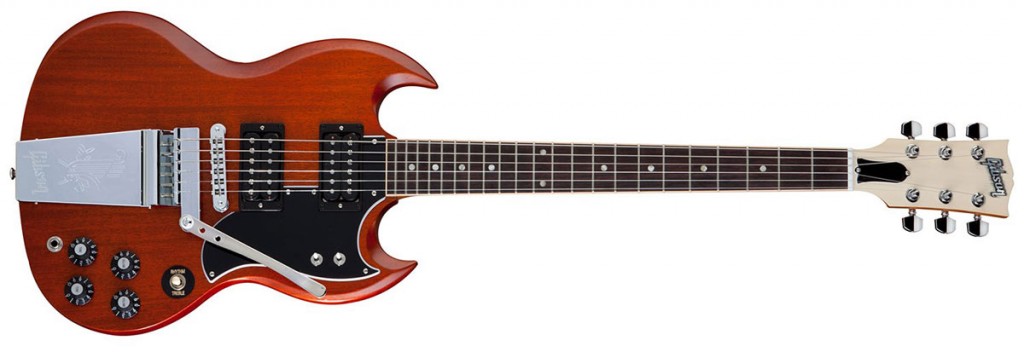
The main key to the Robby Krieger tone is of course his choice of guitar, which was for the most part either a Gibson SG Special or a Gibson SG Standard. Unlike most SGs being made today, Robby’s had a Lyre vibrato system, giving him access to creating some eerie-like pitch bends. Gibson has made some Robby Krieger signature SGs which may be difficult to find, but would be the closest you can find to original ’60s SGs. A cheaper way to do it would be to use a  regular SG-style guitar and change out the pickups for vintage spec pickups. Legend has it that Robby used the SG Special on the first two Doors albums, which were equipped with P-90 pickups. Later when he started using the SG Standard, those had humbuckers.

robby-krieger-gibson-sgWhen it comes to amps, The Doors had had an endorsement deal with Acoustic amps, though in various interviews, Robby has noted how terrible they sounded. The best way to get his tone in my opinion would be to use vintage Fender tube amps such as a Twin Reverb and cranking the volume up. Having the amp set really loud was essential to his tone, as he used his guitar’s volume to control output easily allowing him to go from cleans to distorted tones in a moments notice. A cranked amp also added feedback and harmonic textures that really make solos come to life and just cannot be done in a low-volume setting.

Robby didn’t really use many pedals with The Doors except for a fuzz to get lead tones on songs like When the Music’s Over and Five to One. The exact fuzz he used was a Maestro Fuzztone FZ-1. These are however no longer made today, but can be had from eBay for $300-$400. Some boutique builders also build clones if you are looking an option slightly cheaper. And of course, many fuzz pedals out there can cop similar tones if dialled in right. Just gotta experiment.

Finally, the main secret to Robby Krieger’s guitar tone is in the way he plays. Coming from a flamenco background, he was accustomed to playing with his fingers rather than a pick. As well, he grew his fingernails quite long which I feel is a big part of his tone. Much of his soloing incorporates a lot of hammer-ons and pull-offs which is essential to his sound. He also played slide to get those really eerie sounds. Trying minor open tunings really nails that vibe as heard on the song End of The Night.

So that’s it, all in all a Gibson SG, Fender tube amp, and a fuzz pedal are the main pieces of equipment needed and then playing with your fingernails and learning his playing style will get you the rest of the way.

Fender 60th Anniversary Stratocasters

This is a guest post by Stephen Rose

This year marks the 60th anniversary of the Fender Stratocaster — an iconic instrument in not only shape but also sound. Countless recordings tell the tale of this classic guitar played only by the most discerning musicians. The Fender Stratocaster was released in 1954 offering players a solid contour body guitar with three single coil pickups. This innovation took the world by storm and generations of players are still looking for its classic and timeless tones.

Fender-American-Vintage-Series-1954-Stratocaster
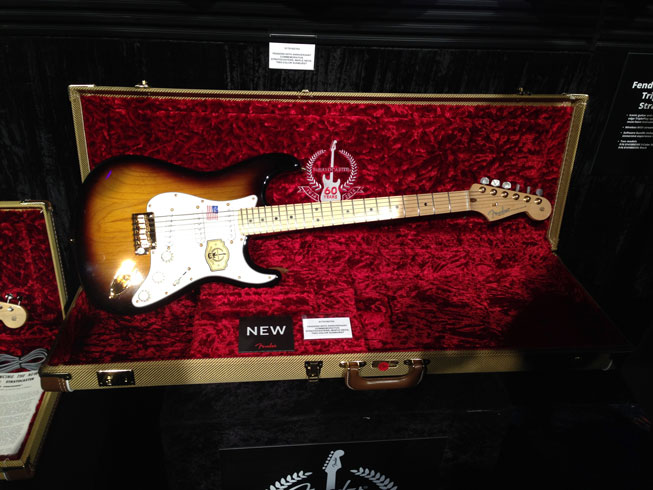
New Fender American Vintage 1954 Stratocaster announced this year at NAMM 2014

Fender has released 3 models celebrating the 60th anniversary Stratocaster: Classic Player, American Commemorative, and American Vintage. The Classic Player Strat comes in Desert Sand, has a soft V neck shape, gold anodized pickguard, gold hardware, a special engraved neckplate, and medallion on the back of the headstock. The American Commemorative and American Vintage series guitars are both U.S. made and have similar appointments to the Classic Player Strat. The American Commemorative Strat comes with a two color ash body, maple neck, modern C compound radius neck, specially designed 1954 pickups, gold hardware, pearloid tuning buttons, and the same neckplate and medallion as the Classic Player. The American Vintage series is the most accurate representation of a 1954 Strat you can buy without going through the Custom Shop. This guitar recreates the specs and even the paperwork of the instrument as if it were purchased in 1954. Fender will only be making 1,954 of these guitars, with the first 54 of these containing a special certificate and designation on the neckplate. The American Vintage Strat is far and away the crown jewel of the three 60th anniversary guitars being offered. In keeping with the original design, I wish this guitar came standard with the 3-position switch instead of the traditional 5. The 3-position switch is included should the player want to make the swap.

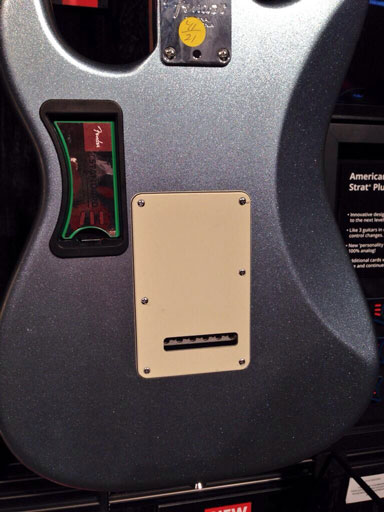
Fender-American-Deluxe-Plus-StratocasterIn keeping with Fender’s motto to create a guitar, “as new and different as tomorrow,” they have released the Fender American Deluxe Plus Stratocaster. Fender is known for finding ways of balancing its tradition and history with innovation, and this new addition is the epitome of that way of thinking. The American Deluxe Plus comes in both SSS and HSS configurations offering the player the ability to use interchangeable “personality cards” to further add to the tonal options of this fine instrument.

There is a slot in the back of the guitar that can support one of three solder-less cards with plug and play capability. Standard is the standard configuration and pickup sound, Cutter cuts the bass and treble, and Splitter splits the humbucker sound of the pickups. This is a highly innovative design by Fender and comes with some updated colors new to the American Deluxe series: Mystic 3 color sunburst, Mystic Ice Blue, and Mystic Black. These guitar feature Noiseless pickups, a modern C compound radius neck, a wallet for the personality cards, and a maple or rosewood neck depending on the version.

Fender has found a way to capture its timeless tone and history with their anniversary models, while pushing the envelope of innovation with its American Deluxe Plus guitar. They have now opened the door to numerous tonal possibilities with the advent of the personality cards, which afford players the ability to save time and the hassle of soldering, while expanding their ever-changing tonal palette.

Marshall AFD100 Slash Signature Amp Review

A man of juggernauting guitar hero stardom, Slash needs very little introduction. The top-hat wearing, Les Paul toting, leather clad icon has been long synonymous with Marshall amplifiers, most noticeably being the first artist to ever receive a signature model in the form of the JCMSlash. Although the AFD100 is the second instalment of a Slash model amplifier, it offers something far different to its predecessor in the sense that it aims to encapsulate one of the most legendary guitar tones ever recorded. The sound of Appetite for Destruction.

Marshall AFD100 Slash Signature Amp Review

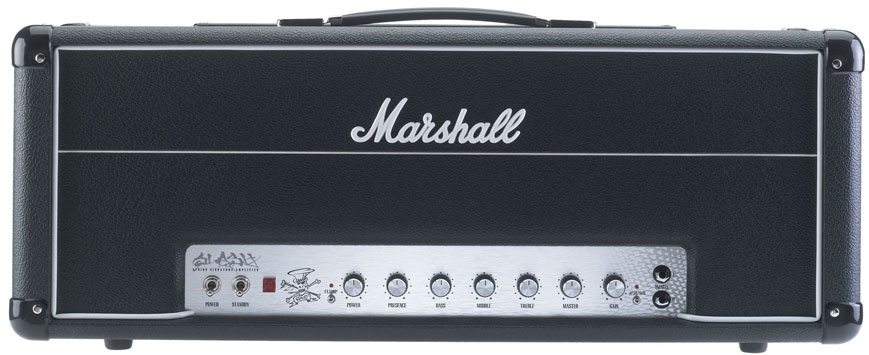
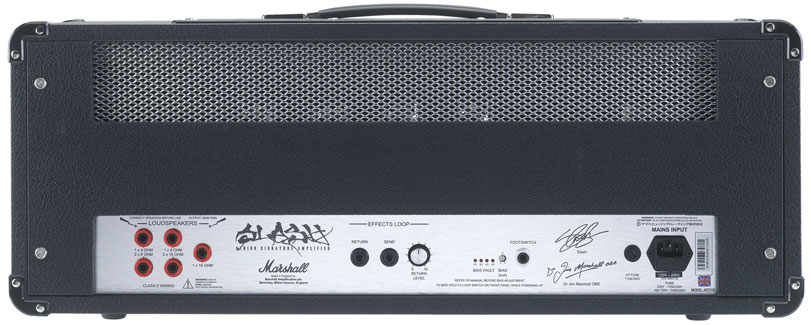
To many, this amp is danger of sounding a tad like a one trick pony, though that’s not actually the case. The 100w head boasts two different voicings, with one based on ‘appetite’, while the other is based on Slash’s later tones. In this reviewers opinion the amplifier is an absolute stunner. Paying homage to the two amps the AFD100 is based on (a modified 1959t and a modified JCM800), the head boasts the width of a JCM800 chassis, the depth of a JTM and height of a JMP. The silver faceplate also adds a nice tilt of the head towards the Silver Jubilee heads that have featured in Slash’s rig since the late ‘80s. Other than the slightly large Slash graphic and snakeskin hologram adorning the front of the faceplate, the amplifier could easily be mistaken for a late ‘70s JMP with a silver faceplate, complete with vintage style switches. Among other features, the amplifier is supplied with a footswitch, a footswitchable fx loop, self-biasing and a power scaling control. Although the footswitch and fx loop are nothing out of the ordinary, the self-biasing and power scaling controls really are something to jump up and down about. Easy and functional in use, the self-biasing feature is activated by pushing the fx loop switch and power switch at the same time. By adjusting a short knob on the back of the amplifier, one can select the voltage at which the amplifier is biased. In use, this feature works rather well and is in actual fact rather speedy, taking only a few seconds to adjust the bias of the head.  On the other side of things, the power scaling control is designed to act similarly to an inbuilt attenuator, scaling the amplifiers output from 100ws all the way down to 0.01w. The reason for this is, as anyone that’s owned a 100w head will tell you, to get a real raunchy rich tone, both the pre-amp and power and tubes need to be gunned. Although the AFD100 features a master volume control, cranking both the gain control and MV together and scaling back with the power control allows the player to access a beautiful, singing, harmonically rich sound at neighbour or small venue friendly volumes. In fact, in my opinion this is one of the most attractive features of the amplifier.

Marshall-AFD100-Slash-Signature-Amp-Review---back

Tone.

Plugging into the first input of the AFD (the second is attenuated by 6dB) and playing through the no.34 mode, you are immediately greeted by a sweet, tight trebly sound, reminiscent of Slash tracks such as ‘Locomotive’ or ‘Back to Cali’. There’s plenty of gain on offer here, and the amplifier genuinely feels a joy to play. Somehow sounding tight but feeling loose, the head responds exceptionally well to pick attack. The EQ adjusts nicely, though to be honest anything within the 5-7 ballpark on all the knobs is a big hit. Some may have a few concerns with the amount of top end when running through the no.34 channel, as the amp is rather tight and biting here, though a bit of tweaking with the presence and treble knobs should provide more than enough tonal variation. Moving over to the amplifier’s namesake sees the head really come to life. The AFD channel is bright, warm, hot and raunchy. The sound fills out excellently, and leads literally fly off of the fret board. Pinched harmonics are a breeze, while pick attack and definition are still prevalent. For those concerned with the appetite sound, there’s nothing closer to the mark. Paradise City, Nightrain, Mr. Brownstone, they’re all here. The neck pick-up is plumby and gorgeous, and the bridge pickup rousingly fierce. Rolling down one’s volume knob or the gain on the amplifier really provides the player with a great vintage Marshall sound. Think Jimmy Page’s mid-70s live tone. Single coils also sound rather fat on the AFD channel, much like Blackmore or Malmsteen. However, those looking for an amplifier with a designated clean channel should be warned, although the AFD100 is a lion of a Hard Rock amplifier, achieving a clean tone takes a fair amount of tweaking that makes switching between clean and dirty sounds a difficulty. Nevertheless, those that are happy to role back their guitars volume controls for their clean sounds should be chuffed to pieces with how well the AFD100 responds to a guitars controls.

In conclusion, anyone looking for an amp with both great dirty and clean sounds, should look elsewhere. However, for anyone looking to capture the appetite sound, or to purchase an amp that has a truly almighty Rock n’ Roll tone there’s scarcely much better. Besides being an amp that recreates one of the most sought after guitar tones of the last twenty years to a tee, the AFD100 is truly just a great, great Marshall amplifier.

TC Electronics NR-1 Nova Reverb Review

This is an extensive guest review by Mike Batke 

Description OverviewTC-Electronics-NR-1-Nova-Reverb-Review
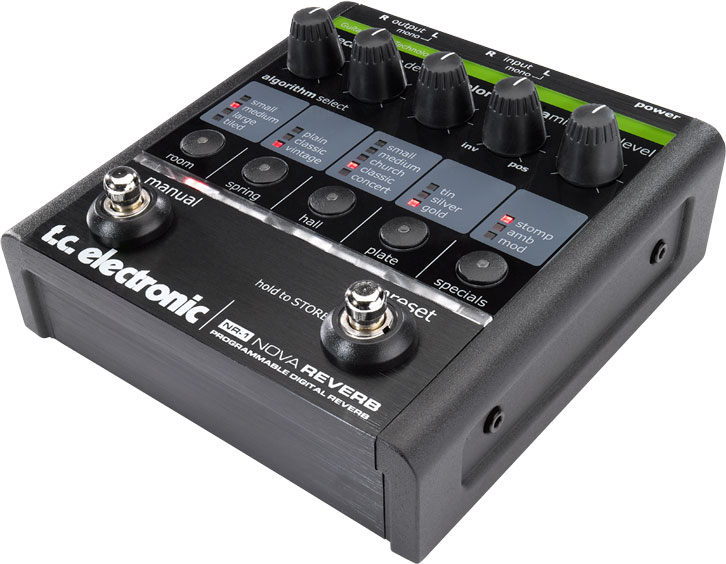
The TC Electronics NR-1 Nova Reverb consists of five banks, or reverb types: room, spring, hall, plate, and specials. Each of these is further broken down into varying room sizes or types further adjustable using the various dials, which I’ll describe further below.

Connections are simple. There is a single 12V power connector (there are no accommodations for a battery on the NR-1). Instrument inputs can either be mono (L), or stereo using normal shielded 1/4-inch guitar (TR) cables. The outputs can be used mono (L), or stereo, however, they come with a ‘monosense’ feature which allow them to either be used with unbalanced 1/4-inch (TR), or balanced (TRS) cables allowing for greater flexibility in recording, or live applications.

Some technical specifications include a 20Hz to 20KHz dynamic range, a 24 bit processor featuring 128x oversampling and less than -90dB of total harmonic distortion. The latency of the pedal is 1.65 ms. It’s best to refer to the manual for anything more specific.

For those of you not really keen on technical specs, the NR-1 is hush quiet and doesn’t have any annoying lag when you play through it, making it great for home or studio recording applications.

Although the Nova Reverb is ready to use out of the box, there are a couple of unique features of the Nova Reverb consisting of (1) being able to calibrate the input level to avoid clipping the device into digital distortion (not a good sound, nor good for any signal chain, nor live sound application after the device), and (2) the ability to modify whether the device fades out or mutes after switching it off into bypass mode.  Again, the manual provides more specific information.

tc-electronics-nr1-nova-reverb-controlsControls

There are 12 controls on the NR-1: Five knobs: Decay, Pre-Delay, Color, and Dynamix, two switches: Manual and Preset, and five selector buttons for each of the different reverb types.

Decay
The Decay knob adjust how long the reverb ‘hangs’ before it falls off into oblivion. It can lead to some interesting multiple echoes, but, in turning it up in a live setting, you can also be fed a healthy dose of feedback. Luckily, the feedback isn’t instantaneous in most cases. Use this knob with discretion, especially at higher volumes.

Pre-Delay
The Pre-Delay, from my experience,  is like the start of the reverb tail. Do you want it to start as soon as you hit the note or do you want a bit of a ‘lag’ in your reverb to allow the notes of the guitar to have some definition? Diming the knob will give you nearly a slap-back reverb separation between hitting the note and hearing the reverb.

Color
From what I’ve experienced with the pedal the Color knob adjusts the mid-range cut or boost of the signal your adding reverb to. With a clean guitar, the effect is subtle. However, when you add a boost or some distortion to the signal chain, how you’ve dialed in the Color becomes very obvious. If you cut the signal too much, you lose definition, and if you boost the signal too much it becomes shrill and harsh to listen to. Think Goldilocks and the three bears with this knob.

Dynamix
The Dynamix knob hails back to the early days of t.c. electronic as it first appeared on the TC 2290 Digital Delay. Basically, Dynamix works like a ‘ducker’ pedal, or an instantaneous fader to lower the volume reverb effect volume. It has three ‘settings’: At the noon position, it does nothing allowing the signal to pass normally. If you cut the signal, it will change the reverb to sound stronger initially, then cut out quickly, ‘ducking’ out the reverb tail, leaving you with a dry guitar sound as a tail — depending how far you turn the knob counter-clockwise. Going the other direction past noon, the knob will duck the initial reverb sound, giving you more dry guitar, then ‘fade-in’ quickly the reverb after the initial guitar ‘attack.’ You may think it’s the same as the Pre-Delay, but it’s not, because it doesn’t ever ‘chop’ the reverb sound — it just drops it out.

Dynamix very noticeable and effective if you play hard-core metal of any type. You can set the Dynamix at full cut, play with a massively huge thickened-with-reverb distortion sound with very little to no reverb decay, depending on the reverb room size you’ve chosen. This gives your muted notes punch and definition when playing rhythm parts.

Manual Switch
Very simply, this brings the NR-1 out of  bypass mode, or Preset mode and into the manual mode which is WYSIWYG: Wherever the knobs are set, is what you will hear out of the device.  When the light is on, Manual mode is engaged, when it’s off you’re either in bypass or Preset mode – whichever you decide.

Preset Switch
The Preset switch is a multi-function switch. When on (indicated by a lit LED), you come out of either bypass mode or Manual mode. When you press Preset the LEDs will correspond to the preset you programmed into the NR-1. However, the knobs will not move to show you their settings. You can change the settings while in Preset, but they will not be stored. To store any Preset setting you must press the Preset switch down for a minimum of one second. Do note: If you change any parameters while you’re in Preset mode, ONLY the edits will get stored if you store them, NOT all the PREVIOUS settings as well as the NEW edits.  This becomes very important if you’re recording. Be sure to switch to the Manual mode and store Presets from there if you want all the pedal settings stored as you’ve adjusted them.

Selector Buttons
If you press the selector button, it will take you to a certain bank of reverb types, and if you press it again, it will scroll through the specific room types until you find the one you like.

Sounds 

In the past, my biggest complaint about digital reverbs has been that they tend to sound ‘electronic’ (poor oversampling rates), or cold, or biting (where the reverb is a bit over the top).

The NR-1 Nova Reverb, with the exception of one setting, is anything but electronic-, cold- or biting-sounding. In fact, it sounds natural, transparent and warm.

Here’s a chart of the sounds you get:

Room Spring Hall Plate Specials
Small Plain Small Tin Stomp
Medium Classic Medium Silver Ambience
Large Vintage Church Gold Modulated
Tiled Classic
Concert

Instead of talking about all the different reverb types, I’d like to focus on a few reverb types for this review. Having said that, I’m focusing on a few specific ones because the rest are standard fare and will deliver outstanding sound quality in each case – or, at least, so MY ears tell me.

I’ll start with the Tiled Room setting, which emulates the sound of playing in a tiled bathroom. This room is bright, not brittle, and has a tight reverb sound, bordering on a slap-back echo sort of feel. Tonally, this slap-back effect is pronounced when using your bridge pickup, and is surprisingly natural sounding.

With the Spring reverbs, I’m particularly fond of the Vintage reverb. Compared to the other two, it doesn’t have any overbearing resonant high frequencies (ringing sound).  It sounds more like an old reverb tank with some springs that have aged into a mellow, warmer lower-mid frequency tone.  The other two Spring types, Plain, and Classic sound brighter. I compare them to playing with a pick or your fingernails where the Vintage Spring sounds more like playing with your fingertips – less ‘attackish.’

Of the Hall types, my favorite is the Church hall. It has the most ‘fluid’ sound of the halls, especially for a larger hall. This is especially evident if you bend strings a lot. It’s as though you can feel and see the sine wave move through the air.  It especially sounds fantastical with a wah pedal.

My favorite Plate sound is the Silver plate. To my ears it gives a guitar a natural fullness. It’s subtle to the point of being transparent once you’ve played for a few minutes. Then you turn it off and miss having it.

With the Specials, the Ambience setting does an excellent job at creating some air and breadth to a guitar sound. There’s not a lot added to take notice of the reverb per se, but there’s enough reverb there to knock back the completely dry sound of the guitar.

In relation to the Specials bank and to a comment I made earlier about one setting being electronic-sounding. That setting is the Stomp setting – emulating  a stomp-box reverb sound. For me, the setting SOUNDS like a lesser-quality reverb. It’s noticeable. Yet, given that, it does do well to cut through a live mix when you need to have that ‘space’ for a guitar part. It’s a bit mid-range heavy but that’s the sonic palette range meant for a guitar, anyway. For soloists, it could well be the setting they use and need most out of the Nova Reverb.

General Thoughts and Conclusions

I’ve owned a few reverb pedals in my day. And I have a couple of amps with reverb tanks. And I do often play just using my amplifier’s reverb. However, if I want, or need, something different I tend to hook up the Nova Reverb to get the results I want. It’s easy to dial in settings and set up a preset, if I need more than one.

As with many pedals, the Nova Reverb does have some drawbacks. The first being that there is only one Preset storage space available. This  can be creatively limiting if you’re playing a live gig and tend to use reverb for solos, emotional or atmospheric effect. Basically, all you’d get live is a dry bypassed signal; a Manual signal, and one Preset stored signal. If that works for you. It’s a fantastic pedal to use live – quiet and transparent.

The other drawback is the 12V power supply, as it limits some people’s pedalboard possibilities as it won’t run on a 9V power supply.

A final drawback, for some, could be the price of the pedal compared to others on the market. It’s nearly twice the price of the majority of the pedals on the market. However, the quality of tones and build is outstanding, and the pedal will give you many years of service if the TC2290 Digital Delay can speak to the build quality.

Overall, the pedal outperforms any pedal I’ve had before it. It’s a high-quality, quiet pedal that does give you a plethora of reverb rooms to play with. There’s something here for nearly everyone to help find tones with in the bedroom, studio, or stage. The t.c. electronic Nova Reverb allows you to create digital rooms as small as a bedroom or as large as a bat cave, the settings are up to you. Noting a couple of limitations, I’d recommend the Nova Reverb to anyone looking for an outstanding reverb pedal.

View the Nova Reverb on Amazon.

Gibson Frank Zappa Roxy SG Review

This is a guest post by Stephen Rose

The Gibson Frank Zappa Roxy SG is a faithful recreation of the guitar that Zappa played throughout the early 70’s, and most notably, the Roxy concerts in December of 1973. This guitar is equipped with some modifications that, while minor, do a great deal to enhance the playability and tone. The Roxy SG is comprised of a Grade A mahogany body and neck, pearloid dot inlays, a Maestro vibrola tailpiece, and two toggle switches for coil tap and out of phase options that adds to the tonality of the over-wound 57 classic pickups.

gibson-sg-frank-zappa-roxy

I demoed this guitar through a Fender Hot Rod Blues Jr. with a Tube Screamer clone and a Fender Mustang I to try out a variety of presets. First, through the Fender tube amp, this guitar sounded flawless and had an overall warmth and the classic Gibson tone that is expected and sought after. When I added some overdrive, I felt the guitar come into its own, especially with both toggles engaged and the pickup selector in the middle position. I have found that this is the sweet spot for the guitar in both clean and overdriven settings. The guitar stays in tune quite well when using the vibrola to accentuate notes. It really is not intended for dive bombs and you will find yourself retuning the guitar shortly after going bar crazy. Next I tried the guitar using the Fender Mustang to see how it held up through a number of different amp models and effects. I dialed in a scooped Mesa Boogie type setting and the guitar sounded great. The next setting I tried was a clean shimmery chorus sound and I very much enjoyed the sounds I was able to get while adjusting the toggles with both the bridge and neck pickups. The placement of the toggle switches do not interfere with playing and I never found myself turning them off or on by accident.

It is important to note that this guitar is easy to play. It has very low action and, along with the slim, unpainted neck, you will be flying up and down the fretboard. The only other guitar I have owned that had this sort of low action and fast neck was an Ibanez Jem. Fret buzz is always a concern when playing a guitar with low action, but luckily there was not any fret buzz to be concerned with and this one was set up very well out of the box.

If your amp setting is bass heavy, I would suggest dialing down the volume on the guitar in the neck position to avoid a loss of desired tone or an added muddiness to your sound. Every player will have their preferences when it comes to “their sound” and I have found that this guitar is versatile enough to be considered an addition for anyone looking to expand their arsenal with a well built guitar full of tonal variety. This guitar is limited to 400 pieces worldwide and, while they are still available, I do not expect that to last through the end of the year. It is already listed as Out of Production on Gibson’s website. As a bonus, a copy of Frank Zappa & the Mothers Roxy & Elsewhere CD is included with each instrument.

Majik Box Rocket Fuel Review

This is a guest post by James Abel

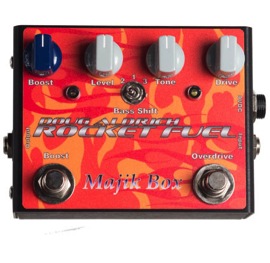
majik box rocket fuelThe Majik Box Rocket Fuel is the signature overdrive/boost of none other than Les Paul-toting, Marshall-blasting and all round hard rock juggernaut, Doug Aldrich. The idea behind the handwired little box of magic, was to produce a boost/overdrive that would replace the rack unit the Whitesnake axeslinger had been using for years. With the help of the American company’s wizards Dave Simpsons and Rob Nishida, that’s exactly what they achieved.
The pedal itself contains two separate circuits that are actually independent, with the overdrive coming first in the signal chain. The top of the flame coated box sports volume, tone and gain controls for the overdrive section, while a single knob controls the boost circuit. Furthermore, a three way mini toggle switch sits between the two bright LEDs, and changes the response provided by the bottom end of the overdrive section. In terms of build quality the stompbox boasts a sturdy construction with a brushed black steel back and sides. Surprisingly, the pedal feels a lot lighter than one would assume, as well as being smaller than it’s portraits let on to. Under the hood, a pristine hand-wired job significantly softens the blow of the $290 price tag, while both battery access and a rather sturdy looking 9 volt power supply input add to the functionality of the pedal.

When first engaging the overdrive side of the Rocket Fuel, and pushing it through an amp’s clean channel, a nice Tubescreamer-like sing is acquired. The drive knob threatens to offer some heat, while the tone and level knobs do what’s expected of them. Moving the ‘bass shift’ through the modes adds a dash of versatility. Starting with the bass shift in the middle position, or number 1, the pedal provides a classic overdrive like sound by providing some cut to the bottom end and a raunchy kick to the mid and treble ranges.  Pushing the bass shift to the left or ‘ setting two’ demonstrates one of the things that set this overdrive apart from others. The bottom end returns giving a strong chunky thud to the signal, though it retains its articulation and avoids any tendencies of the bottom end getting squashed. This is the mode that Doug uses with his Marshalls, and although we’ve not even got onto the dirty sounds yet, it’s clear to see why. The bass shift 2 gives a good, well-balanced tone through most amplifiers while set clean. Flicking the switch to the right, yes you’re getting it; number 3 sees an increased amount of bottom end added to your original signal. This function is hugely beneficial when thickening up single coils or a thin sounding amplifier. One thing that is also hugely apparent about the overdrive side of the Rocket Fuel, is that a real gusty lower mid range kick is injected into the tone, that really helps to add some weight to the sound.

Moving onto the overdrive being used on an already dirty amp, this stomper enters it’s natural habitat. The idea behind the Rocket Fuel is that it pushes an already dirty amp into the wide singing lead tone that Aldrich is recognized for, and it certainly does that to a tee. Engaging the overdrive sees a massive increase in gain, with plenty to go around. A significant volume boost is also noted, as well as bump to the lower midrange, providing all the girth, width and push you could ever want. Much like when running through a clean amp, the tone remains articulate with rich harmonic content. Unlike the clean tone however, the overdrive side of the pedal seems to inject, well, rocket fuel into your tone. Leads soar and really sing, while the response of your dirty sound seems to improve. Winding back your guitar’s volume knob causes the pedal to ease off like it’s not even on, a handy quality if you’re looking to set up a separate rhythm and lead tone via the guitars controls. In terms of the bass-switch the results are generally the same as clean channel, with the exception of bass-shift three, which can tend to get a tad less articulate on the bottom end when using humbuckers.

In terms of the boost side of things, a single knob to control things may seem a little scarce, but that certainly isn’t the case. Twisting the knob towards 12 o’clock causes a hearty increase in both volume and gain as the boost really starts to drive the input of the amplifier. Everything seems to become looser, more fluid and more enhanced with the boost engaged. The tone is significantly fattened and a great deal of projection is added. When used with the overdrive section, the amount of sustain and sing on offer is quite honestly ridiculous and is more than enough to satisfy probably every player’s lead tone needs. The boost function easily bears the weight of half the price tag, as this reviewer struggles to think of any on the market that are significantly better. Another impressive detail of the Rocket Fuel is that it allows both the amplifier and guitar to breath, thus leaving their characters in tact. Furthermore, the fact that this stompbox pushes the valves of an amp to achieve it’s distorted tones, causes there to be a lack of the fizzy or artificial sounds that are spat out by many current distortion or overdrive pedals.

For those looking for a hot, liquid, lead tone in a box, Majik Box’s Filthy Lucre or MXR’S Custom Badass distortions are the pedals to take a look at. However, for those looking for an excellent way to push their already heated amps into a hot rhythm sound or a way to summon screaming leads tones from their cabinets at the stomp of a switch, the Rocket Fuel is a superb choice. A versatile, hand-wired gem of a stompbox, the Rocket Fuel may just be the tonal injection you’ve been looking for.

Re-imagining Softwoods in Electric Guitar Construction

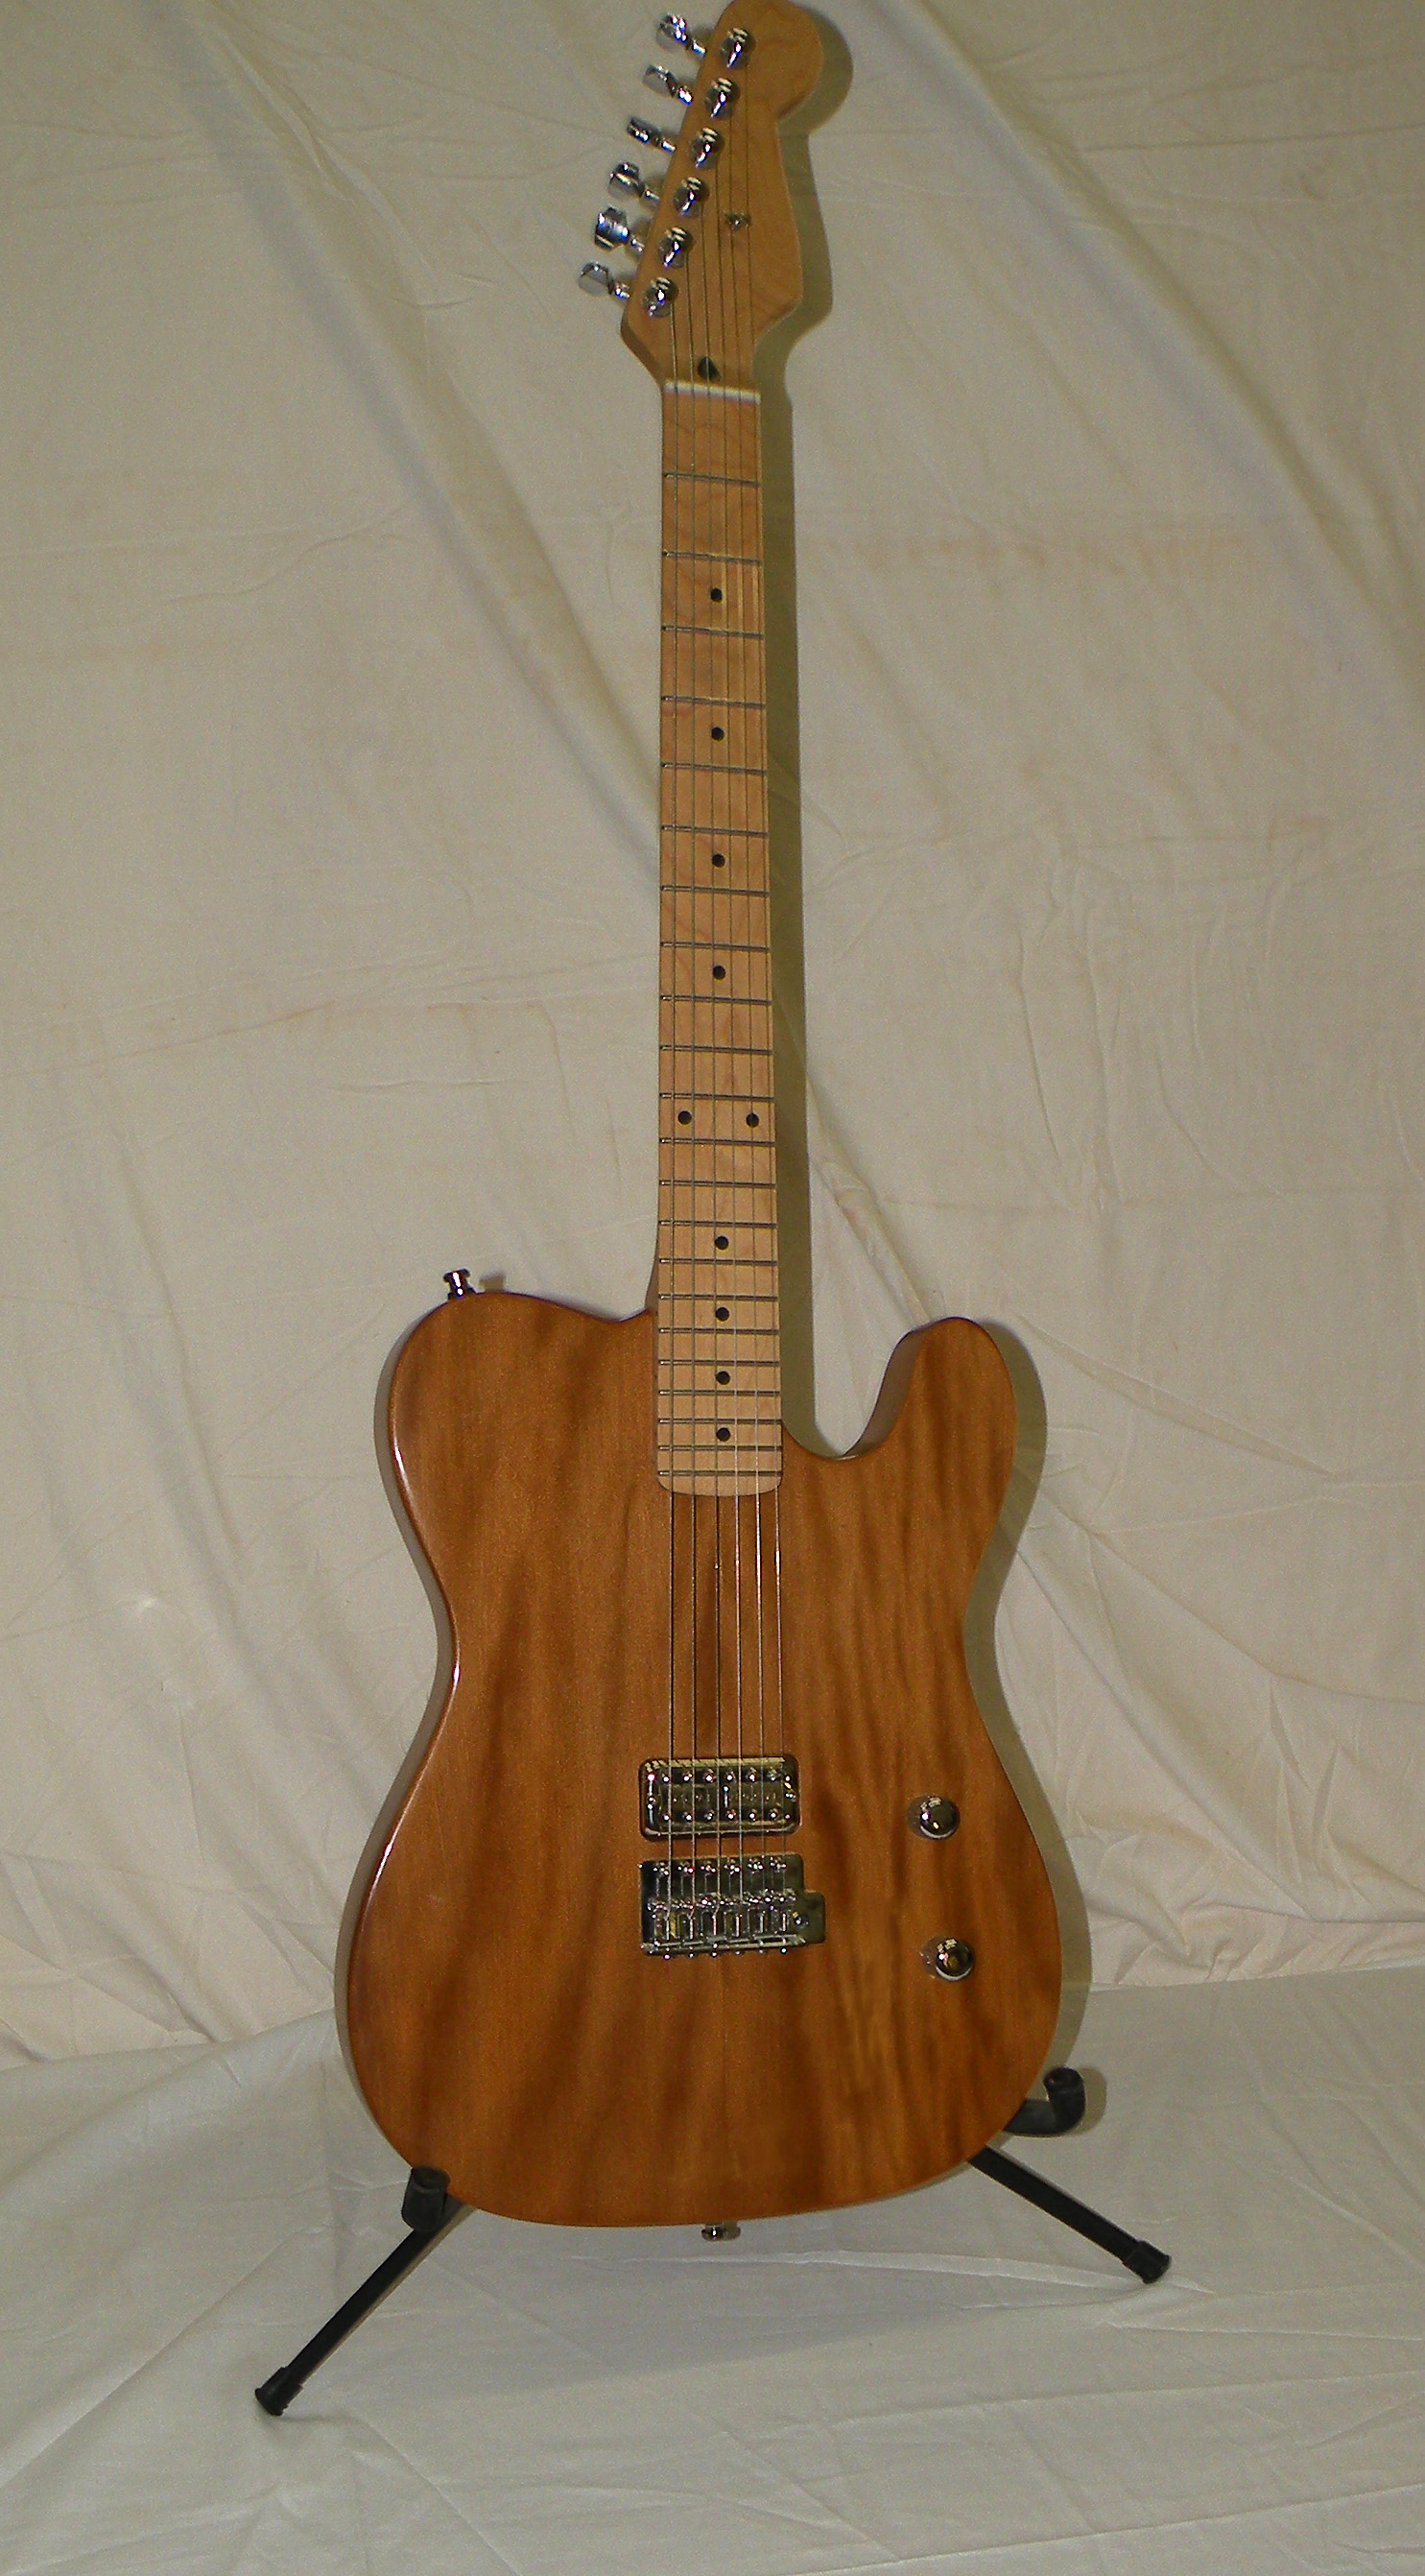
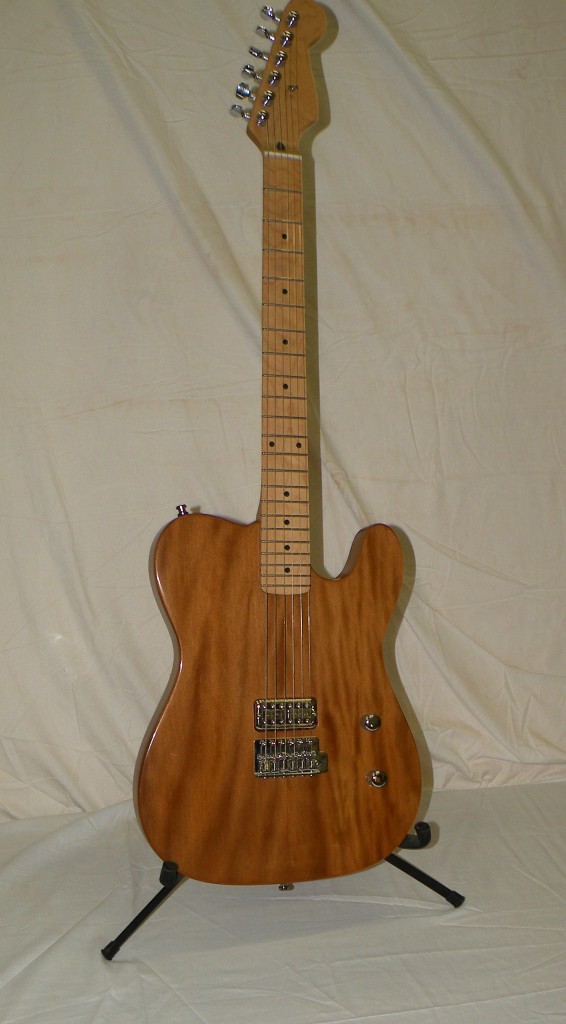
Ancient Kauri TeleThis is a guest post by Jordan Grunow of Ancientwood LTD
This is an interesting time for tone woods in lutherie. Environmental, political and price considerations, as well as good old curiosity are causing a resurgence in alternative tone woods.

Conifer trees, i.e. softwoods, are rightfully claiming their place in the new paradigm.

It is worth remembering that the first Telecaster prototype was built with a pine body. Indeed, the Squier line’s “Vintage Vibe” series is a good showroom example of what conifers can bring to the party.  A/B comparisons between Ash, Alder and Pine bodied Tele’s are fun and easy. The exercise is valuable sonic training for any guitar player. After market bodies are becoming available as well.

High end builders are enjoying the use of soft woods as well.  Solid Spruce, Redwood and Cedar bodied guitars respond very well to both magnetic and under saddle pick up systems.

My own fascination with soft wood construction began with my tenure as Director of tone wood sales at Ancientwood LTD.  We import 50,000 year old Kauri from New Zealand, the oldest workable wood available.  It is in the Pine family and still grows today. In New Zealand, it is a protected species. To understand the capabilities of the product, it was necessary to build a couple test instruments.

Being a tele guy, the simplicity of design and ease of construction made the choice easy. I also happen to have a great G&L Swamp Ash example to compare to. To make the comparison as scientific as possible, I should have used a similar pick up system. The fact that most of the bars I play in have dubious AC caused me to go to a stock filter tron for a sense of twang and air with quieter performance. Well?

The G&L remains one of my favorite all time guitars. It’s the first guitar I wore the frets out in under 5 years. It has all the “pop” and “air” that Swamp Ash is famous for. The Kauri guitar not only has great flame figure, but presents a vastly bigger voice. There is a profound low midrange punch with a more solid initial attack. For fronting a rock trio, it is a much more satisfying tone. The Kauri guitar fills more space in the mix, giving the player access to smaller chord voicing options with outsounding “small”. This is a trait I have found with other conifer species as well.  Another way to imagine the tone is similar to the warmth of Basswood but not as “hollow” sounding as a Strat copy I used to play.

Given the success of the first Tele prototype, I wanted to experiment with a different recipe.    Thinner guitars, such as Melody Makers, frequently will have less bass content. So how would a conifer, such as Kauri perform in that format? Once again, we collaborated with the great John Gray, our go-to luthier. We concocted a set neck Gibson scale instrument 1 1/4” thick. The result is what can be called a very “live” sounding guitar. The attack is very quick and punchy. Compared to my ’62 Melody Maker, the tone is quite similar but with a bit more “air” and great sustain.

We have received several observations that acoustic guitars with Kauri backs and sides present a similar roundness or heft in the mids. I am not aware of the use of other conifers for backs and sides. Our next collaboration is an 8 string Weissenborn to arrive in early December. As always, it will be intriguing to compare it to similar instruments.

There are also potential environmental aspects to consider. Conifers are generally faster growing than hardwoods so can be regenerated more quickly. There are also ample domestic supplies available, sparing the impact to tropical forests. Our Kauri is reclaimed from peat bogs, so no new trees are felled at all.

This is an interesting time in the evolution of tone woods. High quality stock of “traditional” species are getting harder to find. That, and environmental and political concerns are creating opportunities for all sorts of materials. The answers are not always wooden, either.

So, for players looking to have their parts sit in a mix or compliment other player’s tones or like to own several guitars, investigating conifers is a good place to start.


MXR Carbon Copy Review

This is a guest post by Kyle Reynolds

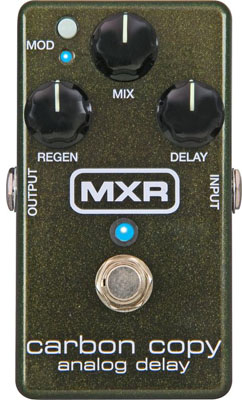
MXR Carbon Copy Delay M169 ReviewThe Carbon Copy is MXR’s entry into the affordable analog delay market and it packs some real value for the price.  Offering 600ms of delay time, the basic essential controls (Delay, Regen, and Mix), and a ‘mod’ switch, MXR gives us a simple interface, with a very appealing warm, analog sound.  Using vintage ‘Bucket Brigade’ technology, and with the (adjustable) ‘modulation’, this is easily the best approximation of a classic tape delay in this price range.  You could spend twice the amount to enter the territory of better analog delay, yet not achieve the quality offered by the Carbon Copy.

On the control panel, Regen controls the amount of delay repeats, Mix provides control over the blend of dry signal vs. effected signal, and Delay sets delay time.  There is also a small ‘mod’ switch that turns off/on the ‘modulation’ effect, which is a very subtle chorus-like effect that mimics the warble of the tape in an old tape echo unit.  The modulation’s width and rate are also adjustable via two internal trim pots if you open the pedal.  The factory settings are very subtle, which are perfectly acceptable as is for what this feature is meant to mimic.

The real sonic beauty of this pedal is that the repeated signal is a degraded one.  Unlike digital delays, which very accurately mirror the original signal, the repeated analog signal is darker, has noticeably less treble, and becomes more low-fi with each repeat, eventually reaching a quiet, subtle fuzz-like sound.  For those looking to repeat the initial signal perfectly, you’ll be disappointed and should look to the digital world, but the Carbon Copy provides a warm, luscious repeat, very ‘musically’ degraded.

If long delays or heavily effected sounds are not your thing, consider the Carbon Copy for this purpose:  Set Regen to almost nothing, Mix just a bit of wet signal to the dry, and bring delay times down to just a sliver, turn the modulation on and you have a very slight signal thickening effect.  Not as ‘tinny’ as a reverb, and not as distracting as a full-blown delay, but certainly adds life to a recorded guitar part.

The Carbon Copy also plays well with others.  It is true-bypass, and unlike many other delays, it seems to sound good in the effects loop, or at the end of the signal chain, or in more unorthodox positions out of the effects loop or near the beginning of the chain.  I found some very pleasant sounds moving this pedal around and trying it before and after various other pedals.  You’re not stuck with traditional wisdom as far as pedal placement goes with this unit.

There are certainly better-sounding and more feature-packed analog delays out there, but not anywhere near this price.  The Carbon Copy can be had most anywhere for around $150.  It is simply the best in this price range – easy on the ears and the wallet.

View the MXR Carbon Copy on Amazon.

Getting the tone: Jimmy Page

This is a guest post by James Abel

A man that needs no introduction, Jimmy Page is arguably one of the most influential writers, producers and players the world has ever seen. His work with David Coverdale, Paul Rogers and of course being the founding member of the biggest Rock n’ Roll band of all time, provides him with a truly monumental status among the legends and kings of guitar heroes. Though when it comes to capturing his sound, Page is possibly one of the hardest players around to land a finger on. Not only is he often secretive over the gear he has used through the years, he’s also used so much different gear it’s difficult to point to a definitive set-up. With that said, this article will aim to cover both the maestro’s earlier tone, as heard on Zeppelin I and early television recordings, as well as the tone Page is more associated with, that’s right you guessed it, a Les Paul and a Marshall.

Early Tone:

During the early years of Zeppelin, page was often spotted using his trusty Fender Esquire, or the axe that is known as many by the ‘Dragon Tele’. Either way, when attempting to capture Pages early sound, a Tele that features vintage voiced pickups is a good way to go. A hunt around on eBay can see you pick up a Fender USA Tele for around $1000 depending on the year or model. Other models that could well be suited to wetting your appetite for all things early Page, include Fender’s 50s, 60s
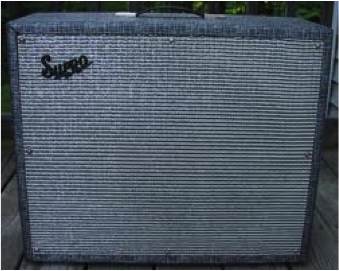
and Baja Telecaster models, all of which reach in around the $1000-$1300 region. For those with a slightly juicier wallet, re-creating Page’s Dragon Tele shouldn’t have you scratching your heads too much. It may be a good idea to start here with a Fender 60s Custom Shop Tele. After that, finding a luthier to apply Page’s famous artwork as well as a silver foil scratch plate shouldn’t be difficult at all. In all honesty though, you hardly need to be a professional artist to have a crack at it yourself. In terms of amplifiers, when it comes to the early page tone, two are often mentioned heavily in books and online. The first of these is the relatively well-known Supro Thunderbolt. Pushing a Telecaster through the Thunderbolt should hit the nail on the head. The cutting, biting sound heard on Communication Breakdown or the droning riff of Dazed and Confused should really hit home here, with the Thunderbolt providing enough valve driven goodness to leave you having kittens. Getting hold of an original Thunderbolt can cost you anywhere between $1600-$3000, and with some hunting around should not be too difficult to locate. The other amplifier that seems to pop-up with regards to Pages’ early sound is the Vox Super Deluxe. Originally designed for the Beatles, the amplifier earned the nickname ‘Super Beatle’ or the ‘Beatle’. For those interested in purchasing a ‘Super Beatle’ the price generally ranges from $3000 upwards, however they’re slightly Jimmy Page Supro Ampless difficult to locate than the Thunderbolt. For fans on a budget, a small valve amp like a Marshall Class 5 or Vox AC4 should get you swinging in the right ballpark. It’s no secret that Page had a soft spot for low wattage amps and both of the above should get you into the general area. In terms of stomp boxes, two or three are real obvious choices; the first of which being the Vox Wah. Finding an original version of this pedal can be more than difficult, and so looking into purchasing Vox’s hand-wired Wah should certainly not be pushed aside. For those with less cash to spend it’s worth looking into both Vox’s standard Wah, or Dunlop’s trusty Crybaby. The second pedal that is a must have when acquiring Page’s early tone, is an overdrive. The first Stomp box that leaps forwards here is the MKII JMI Tonebender. Using a Tonebender to push the input of the amplifiers mentioned above will really help you to gain that gorgeous saturation that has some real clarity when using single coils. If you fancy picking up a Tonebender, JMI offer a large range of re-issues that hit in around the $300 mark. Early effects guru Roger Mayer also offers his take on the overdrive that he originally built for Jimmy, under the guise of the ‘Page 1’. Although this is not a reissue of Jimmy’s early overdrive, it should provide you with the general tone you’re looking for. This also weighs in at around the $300 price range.
Classic Tone:

During the latter years of his career, pretty much anyone could tell you that Page is synonymous with a Les Paul and a Marshall. Although a Les Paul is definitely integral part to Page’s sound, the founding member of Zep has been known to use a wide range of amplifiers, including Marshalls, Hiwatts, Oranges and amps built by Pete Cornish. But let’s take a look at the guitars first.

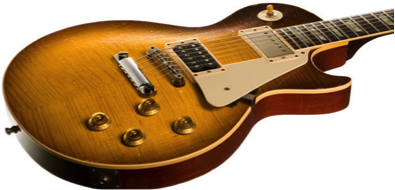
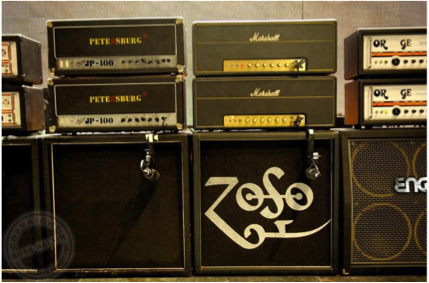
Due to the wide range on offer, finding a Page signature model shouldn’t be too much trouble at all. They will provide you with his famed custom wiring, his suited neck profiles, and all the raunchy, beefy tone his Lester’s exude. However, that does come at a rather painful price, depending on the model and year. A possibly more viable way of getting close to Pagey’s Lester, is to purchase a Gibson Les Paul traditional. The new 2013 model sports a non-weight relived body, as well as Bumblebee capacitors that get you slightly closer to the glory days of Gibson’s golden boy. From that point, you may want to look into having Page style wiring installed, allowing you to phase invert, coil tap and series parallel your way into Page land. Jimmy Page Les PaulIn terms of pickup replacements, Seymour Duncan’s Whole Lotta Humbucker is the perfect option. A set very closely based on the pickups in Page’s number 1, they provide all the width and drive that really makes a non-master volume amp sing. I actually own a set of the pickups, and genuinely believe many people would have a hard time finding a set-up that gets closer to Page’s live tone in the 70’s than a Les Paul, those pickups and a bloody loud Marshall. Another option when it comes to pick-up swapping is Bare Knuckles Black Dog; this is a hand wound pickup that aims to capture Page’s tone. Though if you are one for hand-wound pickups, and would prefer the Whole Lotta Humbucker, the Seymour Duncan Custom Shop also offer a hand-wound version that matches the £250 the price of the Black Dog. Other noticeable axes the Englishman has used include the Gibson EDS1275 used on the live performances of Stairway, Song remains the same and Achilles last stand. For something a tad more out there, getting hold of a Danelectro 59’ reissue will give you the jangly, lipstick fuelled that’s been heard throughout Page’s career. Whether it’s White summer/Black Mountainside, Kashmir or In My Time of Dying, the Dano will give you some of the lesser-known Page sounds at around $500. A very enticing price tag indeed.  In terms of amplifiers it really is down to which kind of Page sound you prefer. During his live performances, including the Zep reunion show in 2008, Page has been known to use several amplifiers at once. If you really do want to go all out when it comes to amplifiers, this is a must when getting to grips jimmy page rigwith Jimmy’s wide and layered sound. A good place to start is with a Marshall 1959 SLP (you can pick up a reissue for around a grand) and combining it with an Orange AD50. Blending the two will help to give you the roar of the Marshall, but the smoother overtones of the Orange providing you with a balanced tone. Adding a Highwatt should get you pretty close to the mark. However, for those looking to use just one amplifier, the Marshall Plexi is probably you’re best bet. You only need to listen to the Heartbreaker solo to realise how much it drips with the swagger of Page. One way in which the SLP can be made to be closer to Page’s own amplifiers, is by increasing the output to 200 Watts and fitting KT88 valves. The added volume and headroom should be enough to give you the clarity when cranked that Page’s tone is synonymous with. When it comes to pedals, the two mentioned above are still a very good bet. However, you may wish to add a few more. A script logo Phase 90 will allow you to get your Kashmir on, while in recent years, the Les Paul toting mastermind has been spotted with a Digitech whammy glued down onto his board.
There are so many avenues of Page’s playing and tone that it would take a novel to cover it. Though, with that in mind, I hope the above article has been insightful of how to get into the general ballpark for one of the world’s most popular players. Whether you desire the early barking Tele fuelled sound of the Yardbirds and early Zep, or the sound of Page’s raunchy, roaring overdriven Les Paul glued low to your hip, there are both high and low budget options out there. With that it mind, when you come to test out some of the above pieces of gear, make sure you don’t play stairway…

Analogman Beano Boost Review

This is a guest post by Robert Payne

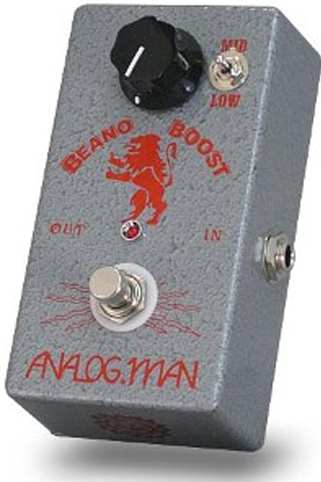
analogman beano boostThe Analogman Beano Boost is often a very misunderstood pedal. There are a slew of pedals that sport clean boost, line driver or micro amp capabilities for a guitarist to help their solos stand out in the mix, however that is quite the opposite of the Beano Boost’s intended use. Analogman admits the simple design of the pedal originally was meant to emulate one particular guitar tone: Eric Clapton’s tone from the infamous John Mayall’s Bluesbreaker album. Purportedly, Clapton used a Dallas Rangemaster Treble Booster in front of the dark 1960’s Marshall amps to achieve the tone. A classic effect in its day for sure and this pedal’s replication of it is spot on.

Eric Clapton’s tone on this record really shaped much of the modern blues tones we are now familiar with. The original effect, as is the Beano Boost, is meant to be on all the time in front of a tube amp. Think of it as a new master volume for the amp. This is what makes the design of this pedal so bold. It also is probably the reason you don’t see this pedal making its way onto too many pedalboards, because in a sense it will become the new master volume for your pedalboard too.

If you are a pedal stacker like me, you might find that many combinations create feedback unless the Beano Boost is first in the signal chain. The volume sweep and shear dynamic range makes integrating it with other effects almost impossible without using another pedal or device to intentionally bring down the output. Personally, I have mine in front of a Barber Launch Pad (Clean Boost) and in a loop based system to control the volume. Both pedals are on and off at the same time via the loop. That said, this pedal also has a tough time recreating that legendary tone with solid state amps. Because the pedal was designed to push tubes, the solid state amps I’ve heard it through create a high micro-phonics issue that you can’t get rid of when you play. This is just my experience and may not be the across the board result. However amps aside, the pedal works fantastic with both single coil and humbucker pickups.

If you’re not interested in nailing that Clapton tone, the pedal also sports a three way toggle switch that allows you to do a Treble, Mid, or Bass boost. This is really where this pedal shines. If you are going for modern country tones, you can’t deny the extensive use of mid boosted overdrive. It’s all over the place on the radio. With the Beano Boost’s mid-boost toggle selected, you can run it into another overdrive pedal a get that killer mid crunch. Again, volume output of the pedal is still out there, so controlling it in conjunction with an additional overdrive, fuzz or compressor pedal just makes sense and seems to be apart of the design. This is my exact application of the Beano Boost.

In the end, the Analogman Beano Boost is a boutique of boutique pedals. It really has a very specific use and specific sound. The pedal is fantastic when setup with it’s recommended use all-the-while inspiring new and unique configurations with other pedals. It’s volume is unwieldy, but if you can harness it, you can truly shape your tone to stand out in the crowd.