Malekko Ekko LoFi 616 MKII Analog Delay Review

Recently we got our hands on the Malekko Ekko LoFi 616 MKII Analog Delay after watching a PGS video demoing the pedal. What grabbed my attention was the crazy-sounding repeats. While they still have the character of your typical analog delay, a bizarre ring-mod texture has been overlaid to give the sense that aliens have landed for the jam. You need to see what I mean, so here is the PGS video:

Obviously, PGS has realized the presence of UFO-like sounds, hence the old film footage. Now onto the review. Lets take a closer look at this pedal as there are a lot of knobs to be found. Here’s a breakdown of the controls:

Malekko LoFi Ekko 616 MKII Analog DelayTime – Control the delay time of the repeats.

Mix – Volume of the delay signal.

Regen – Number of repeats, though I find it also controls the feedback.

Mod – Pushing this button will activate the pitch-shifting modulation.

Speed – Controls the speed of the pitch-shifting mod.

Depth – Controls the amount of the pitch-shifting mod.

T/B – Switches between true bypass and buffered bypass.

The Sound

The LoFi 616 MKII sounds quite good, much like you hear in the above video. I noticed with the delay set closer to slapback, you cannot hear the ring-mod effect. So in this case, it can be used as a standard analog delay which is a nice feature. Adding a little more time to the delay can give some nice Pink Floyd-esque tones. Very nice for strumming.

The pitch-shifting mod is difficult to use as it makes the repeats well.. change pitch. So this mode is more ideal for sound effects and ambient pieces where you are trying to make weird sounds. Setting the depth low makes the mod a little easier to use in a regular setting as it results is a bit of a vibrato.

The mix knob is quite nice in that the delay volume can be set pretty high. This is a nice feature since with the first rendition of this pedal, many complained that the delay signal was two quiet. Definitely not the case with the MKII as it goes very loud if you want it to.

The regen knob as I mentioned also acts as a feedback knob. So turning it up high will ensure that notes get lost in a time-traveling dimension warp. Be careful as the signal gets louder and louder so keep your hands on those dials. Try spinning the time knob when the feedback comes in to get some really wild sound effects.

In conclusion…

Overall, I am quite happy with this pedal. Since you can use it as a regular analog delay when the time knob is set low, it is quite the useable. If you like to do ambient, UFO, experimental or scary-movie soundtracks, then this is an ideal pedal for you. It is very unique and with all of the dials on it, there are really unlimited sounds to be discovered with it.

How to use a Wah Pedal

vox wahI have had some requests on how to use a wah pedal. This article will show you how to use it, and also have some great wah pedal tips to really take full advantage of the pedal. So lets get started.

What is a Wah Pedal?

A wah pedal is in the form of an expression pedal. When you engage the pedal, having the rocker toe-down will make your guitar tone full of treble with little to no bass. Alternatively, having your toe up and the back of the rocker pushed down will make your guitar tone have lots of bass and little to no treble. So rocking the expression pedal back and forth will let you go from bass to treble, creating a “wah” kind of sound. Since it is an expression pedal, there are a ton of positions the rocker can be in, to get the desired amount of treble and bass.

RELATED: The Best Wah Pedals on the Market

Tips to Best use your Wah Pedal

  • Using the neck pickup with make a fatter wah sound, while the bridge pickup of your guitar will give the wah more of a quack. The bridge pickup seems to be able to produce a more vocal-like sound.
  • To make single notes have a “wow” kind of sound when you solo, pick the note while your foot is in toe-up position, and then quickly toe-down. The note will get that “wow” sound.
  • If you want different tones to solo with, turn your wah on and leave it in one position. You can get tones all over the map, from laid back and muted to bright and in-your-face.
  • Get some really cool wah tones when your amp is dirty. Putting an overdrive after the wah can help achieve this.
  • It want more of the vocal quality of the wah to come out, try using the wah during a more chilled-out section of the song, as many of these qualities are subtle and can be lost in a heavy mix.
  • Try using the wah for rhythm parts to get that underwater sound. This can be done by playing your rhythm normally, but rocking your wah back and forth slow and steady.
  • Experiment stacking your wah with other pedals. I really like to use it with a univibe.

Hope this helps you better use your wah pedal!

How to build a Guitar Pedal

A beginner’s guide by Guitarist, Jason Rooney. 

guitar pedal kitThere are many reasons one may choose to build their own pedal. Personally, I tend to be a very die hard DIY’er whenever I can get away with it, and I wanted to see if I could save a few bucks on some great sounding pedals by doing some of the dirty work myself. Whatever your reason, you will need a design or schematic to go by, a trusted source for your parts, time, and fair amount of patience. When I started my expedition, I had a fair amount of soldering experience and a basic understanding of circuitry and wiring. However, schematics looked to me like a message from an Alien race that I just couldn’t understand. I could find a lot of schematics of my favorite vintage pedals, but couldn’t do much with that information. Fortunately for me, I found a company that sold kits consisting of a printed circuit board, electrical components, an enclosure and all of the needed hardware. My first kit was a clone of a TS808 Tubescreamer. I must admit, it was a bit intimidating at first to open up the box and see a bunch of parts and pieces staring back at me and this would eventually become a pedal. The fear soon passed after I dug in and went to building. Having a circuit board with an outline of the parts on the board was very helpful when populating the board for the first time. I liken it a sort of painting by numbers. Find the spot and the corresponding part, solder, repeat. The wiring of the board to the hardware, jacks and pots, was very similar. Connect point A to point B, etc. I had particular fun when it came to painting the enclosure. This was a part of the pedal kit building that was mine all mine. After some paint and some drying time, it all went together for the moment of truth. Click… no sound. Click…. Nothing. I was so bummed. After chasing down all of my connections, in my haste I left one wire disconnected from the output jack – A simple fix. Now I was cooking with gas. The result was a great sounding clone of a pedal that would have cost me easily twice as much as this kit. Not to mention it gives me a great sense of satisfaction coupled with a splash of pride to know that I built that pedal I’m stomping on, this is a one of a kind, and I can do small mods to tweak and to my heart’s, or ear’s, content.

Getting started
There are a minimal amount of tools needed to start this journey, but some you may already have around the house. If not, you do not need to break the bank. As is with most things in life, I would urge you to buy the best you can afford at the time.

It is absolutely necessary to have a decent soldering iron. I would recommend an affordable iron that is around 25 watts and has a fine conical tip because you’ll be getting into some tight spaces. A reliable rosin core solder of small diameter is key. You won’t need a large amount, as a little goes a long way, but a standard spool will last a long time. Wire strippers are essential to peeling off the covering of the wires and exposing the bare wires to solder. Something to clip the leads of the components from the board. I

use fingernail clippers, but flush cutters work well too. Anything that can clip and get as close and parallel is what you’re after. Mistakes are inevitable and you will need a way to remove solder from the board or components. I suggest a solder bulb or de-soldering braid to remove solder. This will allow a clean and fresh area to re-solder the right part, or help when you want to swap something out for a mod.

Building the pedal takes time. Always have a reference of somekind nearby. This can be your layout, schematic, or instructions that accompany most kits. Don’t rush when soldering or wiring your pedal. If done right, your builds will provide you years of service. You are the builder and you are the quality control, this thinking may urge you to put in the extra effort that will make all the difference in the long run. Things don’t always work out 100% all the time. There can be bad solder joints, unexpected connections or shorts being made due to cramped space, and the occasional bad component, as well as a host of other problems often overlooked by the builder. There are plenty of forums of people discussing their builds and problems available for free online, so use those to your advantage for troubleshooting. I’ve also had great results contacting the companies I’ve ordered from.

When it comes to the enclosure, let your imagination guide you. This is your canvas and the face of your pedal to show the world. Just be patient when allowing your paint dry! I got ahead of myself a few times and have some fingerprints in my creations to prove it. Pre painted and powder coated enclosures are also available in a variety of colors and sizes from many sources if you aren’t too confident in your artistic abilities.

Starting out, building kits greatly helped ease me into the pedal building and modding world. Starting with very basic layouts helped me hone my soldering skills while learning what the parts were and how they went together. I first learned how to mod my kits and this knowledge carries over to any pedal. I now understand and can read schematics, find sources for parts, and I’ve learned how to etch my own boards based on different layouts or designs. With anything gear related, you can go as deep as you want.

Catalinbread Dirty Little Secret MKIII Review

This is a Guest Review by Guitarist, Stephen Rose.

catalinebread dirty little secret mkIIIRecently, I purchased the Catalinbread Dirty Little Secret MKIII and I must say, I am very impressed with the versatility of this pedal. Using my Gibson Les Paul Standard through a Fender Humboldt Hot Rod Blues Jr., the amp is set up for a basic clean tone, which really allows this pedal to shine. This pedal is designed to sound like a Marshall Super Lead or Super Bass depending on which mode is engaged. Each mode offers many tonal benefits and this is the first pedal that I have played that is so responsive to the volume and tone controls of my guitar. The layout of the pedal is a very straightforward with a 5 knob layout: Treble, Middle, Bass, Master, and Pre-amp. The Pre-amp knob essentially functions as the pedal’s gain setting. The Treble, Middle, and Bass knobs are tonally sensitive and can drastically influence the overall sound, depending on the setting. There is also an internal Presence knob that can be customized when the backplate is removed, but I chose to leave it as it came. In both the Super Lead and Super Bass settings, I was able to conjure up some very familiar Page, Hendrix and Young sounds that were spot on to the original recordings.

The pedal comes shipped set to Super Lead and has the Plexi to JCM800 range of sounds covered. With the knobs set to 12 o’clock, I found this setting to be a bright sound, rich with Treble and Mids. I dialed back the Treble and Mids a little and increased the Bass for a sound that was more pleasing for my tastes. To get more break up and a distorted JCM800 type of tone, increase the Pre-amp and this pedal will truly achieve that hot-rodded type of sound.

Switching the pedal to the Super Bass mode is very easy to do. Unscrew the backplate and with a flat head screwdriver or similar tool, move the slider switch over to the Super Bass section. This setting is my favorite of the two and is very reminiscent of the Marshall JTM series of amps and it can easily bring you into the Clapton Bluesbreaker era of sounds. Then with the Bass off, Pre-amp around 2 o’clock, and the Treble and Mids all the way up, you can get a highly accurate AC/DC type of sound. My preferred setting had the Treble at 1 o’clock, Mids around 12 o’clock, and Bass at 11 o’clock. The Master should be set in accordance to the volume of your amp and I like the Pre-amp around 2 o’clock. This allows a clean tone with the guitar’s volume turned down a little and some nice break up when the volume is turned all the way up.

This pedal shines with its transparency and improvement rather than replacement, of tone. Even when I used the coil taps on my guitar, the pedal did not suffer any sort of output loss or negative tonal change. This pedal is worth checking out if you are looking for that British type of overdrive that will also improve your tone’s flexibility. It does not matter if you use humbuckers or single coils, this pedal can do it all.

Best Guitar Pedals

We are often asked, what are the best guitar pedals? Well there are really so many to choose from. So we figured we’d put together a list of the top 10 best guitar pedals, generally speaking that is. The ordered list will consist of types of guitar pedals and we’ll add some recommendations for each of the top pedals in that category.

1) Wah Pedal

Ah the famous Wah pedal. There is really nothing quite like it! Who would’ve thought that a pedal that lets you go from bassy to trebly on the fly via an expression pedal would be so innovative. It literally can make your guitar sound like it’s talking! Such a cool pedal and always a crowd pleaser, making this number 1 on our list. Check out our list of the best wah pedals on the market.

2) Overdrive

The overdrive pedal  makes its way into second place as it allows you to really shape and color your tone. It can be used in a variety of ways, and can literally give you hundreds of tonal variations. An OD will really help push your amp, giving you more touch sensitivity and gain. Maybe you just want to kick it on for solos, or keep it as an always-on pedal set to dirty. Check out our list of the best overdrive pedals on the market.

3) Univibe

Why is the famous univibe so high on this list, you ask? Well because of Jimi Hendrix and David Gilmour, thats why. This pedal can really take you on a trip through mind-altering states without any substance! Get a lush heartbeat chorus or switch to the eerie vibrato mode. Here’s our list of the best vibe pedals.

4) Fuzz/Distortion

Want your tone to go balls to the wall? Get screaming solos, and sustain that goes on forever. These high gain pedals changed the electric guitar world forever, allowing guitarists to get the craziest of sounds! Do your best dive bomb, and let the entire audience feel it! Check out our best fuzz pedals list.

5) Delay/Echo

With a nice delay or echo, you can achieve some other-wise impossible sounds. Get huge soundscapes like The Edge, or set it to a nice slapback to thicken your guitar tone. Lots of fun experimenting to be had with a delay/echo pedal. Check out our picks of the best delay pedal.

6) Octave Pedals

Add another octave on top of your current tone. This works great for solos. In the past, you could only go one octave up, but today there are many pedals allowing you to go up, down, both, more than one octave, etc. Some great octave pedals includes the POG, FoxRox Octron, and the Chicago Iron Octavian. Check out our picks of the best octave pedals.

7) Boost Pedals

Sometimes you need a boost in your tone, without it getting too dirty. Boost pedals are a great way to make your cleans more chimey, and adds a bit more sustain on tap. Great for a little extra umph to your tone. Check out the Xotic EP Booster.

8 ) Chorus

Sometimes you want that lush, watery type of tone that feels more ambient. It can really add more depth up your single notes as well, and makes a fun stack with distortion. There are many different chorus pedals on the market to choose from. Here’s are list for the best chorus pedals on the market.

9) Reverb

If your amp doesn’t have any onboard reverb, then trying a reverb pedal is a must! Get a surf tone from the 60s’, or the out-of-phase sound of the psychedelic era. Reverb really adds space and dimension to your tone. Take a look at our choices for the best reverb pedal.

10) Tuner Pedals

Why did tuning pedals make the list you ask? Well if your guitar is not well in tune, than you will sound bad no matter how good your tone is.  A tuning pedal allows you to tune during a performance. Usually it mutes your guitar so no one really knows that you are tuning at all. Check out the best pedal tuners.

Well there you have it, our top 10 of the best types of guitar pedals. Here’s some other great pedals to check out that almost made the list!

Best Tubescreamer Pedals

Best Guitar Looper

Best Compressor Pedals

Best Overdrive Pedals

Digitech Whammy WH-1 Review

This is a Guest Review by Guitarist, Stephen Rose.

digitech whammy wh1Since its introduction in 1989, the Digitech Whammy WH-1 pedal has become a staple for many musicians due to its unique array of tonal options. Though the WH-1 was only in production for four years, it has had a long lasting significance and is highly coveted. The Whammy pedal has been so successful that Digitech is now on their fifth generation of this special device. It’s versatility and pitch-shifting capabilities has drawn the attention of diverse artists such as: The Edge, Tom Morello, Dimebag Darrell, and Steve Vai. The unmistakable sound of the Whammy’s pitch shifting abilities can be heard on familiar tracks like “Killing in the Name”, “Even Better than the Real Thing”, and “Becoming”.

The WH-1 is housed in a solid metal casing with a sturdy treadle, which is topped with a thick piece of rubber. It can definitely be thought of as a revolutionary, pitch-shifting tank. The pedal that I am reviewing is well worn but still functions without any noticeable issues. The WH-1 offers 16 pitch-shifting options, which are selectable via a rotary knob. There are 5 different Whammy options that can raise or lower the pitch by 2 octaves. The Detune setting allows the user to pick a Shallow or Deep setting. I find the Shallow setting to be tone-friendly and is only engaged with the pedal in the toe down position. Many of the settings in the Harmony area do not offer a great deal of appeal to me, but I am a fan of the harmony going up a 5th in the toe up position and up a 7th in the toe down position. There are a couple of positions on the neck that reminded me of the “I’m melting” scene in The Wizard of Oz. Many of the other settings, regardless of treadle position, sound very much like 1980s’ arcade games when played higher up the neck.

Some drawbacks to the design of the Digitech Whammy WH-1 would be that any change to the current setting has to be done by hand, and the WH-1 does not offer any sort of light indication to help with the selection. This could be very challenging if trying to make a change during a performance or recording session. Newer Whammy models offer a light to indicate the current selection. Another downside is the requirement of a particular power supply for operation. Many pedals offer both a power supply or battery option for power, but the WH-1 and all other subsequent models only allow for a brand-specific power supply. While I didn’t have the original one that came with the pedal, I was easily able to locate an aftermarket power supply that worked.

All in all, it really is a great pedal that is like no other, allowing you to get the craziest of sounds out of your guitar. Check out the Digitech Whammy on Amazon.

Echoplex EP3 Review

This is a Guest Post by Guitarist, Jason Rooney

Echoplex EP-3
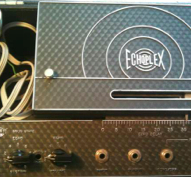
On the long and winding road that is the pursuit of tone, it’s not long before we arrive at the Echoplex. We have no doubt read about tape delays, dreamt about them, but have definitely heard them on countless recordings. The EP3 Echoplex is the second generation in the Echoplex line and the first to offer a solid state preamp. The EP3 is an analog delay that does something I’ve found only tape can provide. Like many analog delays, the repeated notes continually degrade and ultimately taper off in a musical and natural way. However, the Echoplex does something very special with the repeated notes. The entire sonic space comes alive without stepping on the original notes. The echoed notes grow into a 3D atmosphere behind the performance that become slightly compressed with hints of a bright and chimey chorusing effect.

The Echoplex is in no way a one trick pony, it can do it all. From a guitarist’s perspective, the EP3 can handle diligent slap back to dotted eighth notes inspired by The Edge. Vocals sound amazing through it, and many keyboard and synth enthusiasts swear by them as well. If you desire, you can send the delay oscillating and get some UFO sounds as well. And that is just in ‘echo mode’. The EP3 also offers a Sound on Sound feature that allows the user to take advantage of the Echoplex as a personal recorder and playback device. You can record a performance onto the tape and play it back to play over it. Somewhat of a looping feature only limited to the length of the tape in the cartridge.

The control panel of the Echoplex may seem a little menacing at first, but the controls are very standard to the delay world;

Echo Sustain: This controls the amount of delayed notes and also serves as the power switch.

Echo Volume: The volume of the delayed notes.

Echo Delay: A slider bar that controls the delay time by moving the playback head closer or farther away from the recording head.

Sound on Sound/Echo switch: This toggles between echo and sound on sound modes.

There are four 1⁄4” jacks on the face of the unit as well. Input, output, a footswitch jack to switch the delay on and off, and one to turn the sound on sound feature on and off.

When it comes to gear, especially vintage, we must factor in maintenance and a little bit of TLC. After all, the EP3 is a machine with moving parts that need to be cleaned and oiled. The tapes will eventually wear out, the sound gets increasingly wobblier, and the repeats become less strong. When it comes to tape replacement, cartridges are still available through a few sources as well as tape rewinding services. As the tape wears, it leaves a magnetic footprint and a brown dust behind. About the time the tape needs to be replaced, it’s a good idea to demagnetize and clean the tape heads, tape path and roller with either 100% denatured alcohol and a high quality rubber cleaner, or specific cleaners available for tape machines.

I must admit, I have received some strange looks and many questions when I’ve toted my EP3 to a gig or rehearsal. After all, it is somewhat of a clunky “mystery box” weighing 15lbs and requires a fair amount of real estate. After the EP3 has been set up and I start playing through it, The heavenly sound speaks for itself.

The Best Looper Pedals on the Market

Today’s article will talk about the best looper pedals available today. Also known as loop stations, these pedals make it easy for one person to create an entire song on the fly. Basically you can record yourself by pressing the pedal with your foot. When you press it again, it will keep looping back to you. You can keep adding layers on top. Its great for recording  some tasty rhythm guitar on loop to solo over. It really is a fun pedal, and has its place in a live setting as well. So lets take a look at the some of the great looper pedals out there.

Boss RC-30 Loop Station

This is one of the best loopers out there and is the ultimate for the one man band. With true-stereo, you have access to  two foot pedals that lets you play two independent loops in sync. You can record an insane amount of tracks, so layering is excellent with the RC-30. With microphone inputs added, you don’t just have to use a guitar through it. Finally there is a USB connection to save your creations, and upload wav files to add to the loop station! Not cheap at $299 US, but it is one of the best out there and cheaper then the others in this caliber. View the RC-30 on Amazon.

Digitech JamMan Stereo

As the name says, another stereo looper for a more dynamic sound. Again, this is very ideal for the solo performer, but still cool to play around wiDigitech Jam Man
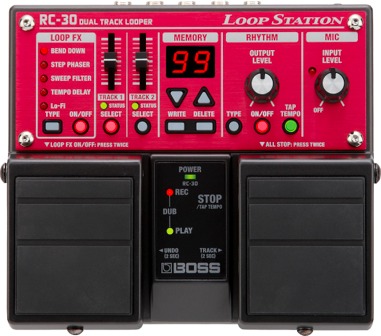
th at home. You can store up to 35 minutes of loops on this pedal, which is more than enough. Like the Boss RC-30, there is a USB for managing your loops on your computer. They even include a software for this purpose. Features such as reverse playback, CD-quality sound, and mic inputs makes the JamMan a very versatile pedal. View this pedal on amazon.

Best Cost Effective Option

Boss RC-3 Loop Station

The baby brother of the RC-30, the RC-3 is much more simple, yet retains the same great recording quality. Impressively, this pedal is also true stereo. Tap tempo features helps you get the beat you want in seconds, so that you’re loops are perfectly timed. It even has some drum beats so you don’t have to just play to a metronome. Very pedalboard-friendly, and with USB features like the RC-30. The RC-3 is a great option for someone who needs a good loop station without all the bells and whistles. View the Boss RC-3 on Amazon.

Blackstar HT-Dist Review

This is a Guest Post by Guitarist, Jack Rowan

blackstar ht distThe Blackstar HT-Dist is a wonderfully versatile tube distortion pedal, particularly suited to Rock and Metal genres. Its biggest selling point has to be the sweet little ECC83 valve at its heart, which gives a very convincing likeness to the natural distortion and responsiveness of a full sized tube amp. Being able to see the valve glowing through the grill on the front is an aesthetically pleasing touch too. This is a great feature if you own a solid state amp and want the responsiveness of a valve amp without actually having to buy the real thing. Although the emulated output can sound a little thin, it is brilliant for recording straight to your computer for quick demo’s or even just for practicing at lower volumes through a home studio set-up.

This pedal has excellent tonal range, the 3-band EQ allowing for much greater fine tuning than the classic ‘Tone’ knob on most solid state distortion pedals. As with the Blackstar amps, their pedals also come with the unique ISF control. This can essentially be seen as an extension of the EQ, allowing the user to blend between American and British tone. Turn left for heavily scooped mids and a tighter bottom end, turn right for boosted mids and low end that can get a little muddy if you’re not careful.

Though the 3-band EQ and ISF give it more control, it could be a little daunting for the less experienced player. I highly recommend extensive experimentation with the controls to find your ideal tone. Naturally, it responds differently with each amp, but as a rough starting point I would set the EQ knobs to around 2 o’clock and the ISF in the middle.

I typically use this pedal in my live set-up in front of my Orange Rocker 30. By dialing in a nice crunch tone on my amp’s gain channel, I can then switch on the HT-Dist to effectively add another high gain channel to the set-up. As the Rocker 30 is very heavy in the mids, I prefer to have the ISF at around 10 o’clock to give a slightly scooped tone and tighten up the low end. Depending on the amount of gain dialed in on your amp, you really don’t need much on the pedal to here the difference. I have found this to be excellent for getting an ideal tone for high gain metal coming out of an amp built for heavy rock at best. By having the pedals ‘level’ higher than the amps volume, the pedal can then also be used as a great solo boost. The responsiveness of the valve means you can hear every nuance in your playing and every note in those big full chords. The cascaded valve gain stages allow you to access a wide range of tones, from light crunch through to full distortion lead as you turn up the gain control.

There are a couple of downsides to having a valve pedal; the 22v DC adaptor means no daisy chaining on your pedal board, and the valve will eventually need replacement after extensive use. On the upside however, having gigged regularly with this pedal for 2 yeas now I can confidently say that it is a very solid, well built piece of gear. With quite an intense live show it has been kicked and beaten about with little to no signs of wear and no effect on it’s output.

For serious players interested in a solid built, wonderfully versatile and responsive distortion pedal for rock/metal tones I highly recommend giving the Blackstar HT-Dist a try!

View this pedal on Amazon.

Best Compressor Pedals

Today’s article will showcase the best compressor pedals on the market. There is something about a nice compressed guitar tone that has that undeniable warmth and endless sustain. And best part is that compression pedals stack well with many other pedals such as overdrives, reverbs, etc. So lets take a look at some of the top compressor pedals other there.

Mad Professor Forest Green Compressor

The Forest Green Compressor just has great dynamics that respond beautifully to your pick attack. It gives that sparkle to your tone that makes it sound addictive. This pedal can be set lightly, so your tone still sounds very organic. If sustain is your top priority, the Forest Green has a sustain switch that really gives you endless amounts. As well, there are controls for level, compression and tone. Nice and simple, but enough leeway to shape the tone the way you want it without spending too much time tweaking. While the price may be steep ($359), there is a cheaper PCB version that many are very happy with. You can check it out on Amazon here.

Pigtronix Philosopher King

Pretty big pedal here, not for those who are looking for the pedalboard-friendly option. But it is a pretty insane pedal because the possibilities are really endless. You can have backwards guitar solos, and tremolo effects as well. With enough controls to shape EQ, you can also control sustain, compression, volume, swell, and lots more. This is really a tweaker’s dream, so if you want to have maximum flexibility on a compressor, then the Philosopher King is for you! Check it out on Amazon.

Effectrode PC-2A Compressor

If you are looking for the warmest compressor pedal out there, then the Effectrode PC-2A is your best bet. It gets its warmth from an all-analog signal path and a NOS tube. You get a very organic and full sound from this pedal. Word on the street is that David Gilmore of Pink Floyd uses one. Not the most tweakable pedal as it only has two knobs (peak reduction and gain), but it really is all you need to get such a pure and spacey tone. If it is good enough for David Gilmore, then it is good enough for you. Enough said.

Keeley C4 Compressor

Another great, organic-sounding compressor that makes sure to preserve your guitar’s original tone. Very low-noise pedal, but with lots of output on tap if you need it via the level control. Other knobs are for sustain, attack and clipping. The C4 is really a great choice as Keeley is known for studio-quality boutique pedals. If tone is your top priority, then you won’t be disappointed with this one. The C4 is winner of multiple awards, probably because it uses high-quality components and also because Robert Keeley is a perfectionist. Take a look at the reviews of this pedal on Amazon.

Well there you have it, the best compressor pedals available!