 This is guest post by Scott Martin
Today’s article will be a review of the Empress Tape Delay.
The effects-obsessed 21st century guitarist is living in an extremely beneficial time in history for those afflicted with their condition. Whatever sonic sauce they are looking for, be it overdrive/fuzz/reverb/phaser/etc, somebody somewhere has (most likely efficiently and inexpensively) made a digital pedal or plug-in of what they’re after at the given moment. As a delay junkie, I find myself both astounded and thankful at the plethora of options available to me. Effects companies everywhere have come up with new and inventive ways to turn an audio signal into a cascading, echoing deluge of ones and zeros – and let’s be honest folks, some of those ones and zeros out there sound extremely good. A good digital delay can be depended on to not only get the job done, but also to be relatively small and inexpensive. And yet, despite all this convenience and economy of space and dollars, some guitarists still find themselves attracted to the halcyon days of a much more primeval era in audio technology.
Ah yes…the fascinating and antiquarian world of tape delays. Since the 1950’s, guitarists have been using these rather quirky, mechanically-based machines to create lush soundscapes and shimmering rhythmic melodies filled with repeats that fade brilliantly into the aether. As the magnetic tape in a unit aged and warped over time, the repeats would get grainier, more “washed out” sounding, and in general, develop very interesting modulation characteristics which, depending on the machine, can be easily identified and catalogued by vintage tape delay aficionados much the same way a wine connoisseur can tell you the important and blatantly obvious differences between say, a glass of Shiraz and another of Malbec.
Not every guitarist may posses the capacity (or desire) to tell the sound of a Roland Space Echo from that of a modern day Boss DD-7, but the difference is there, and some are known to spend thousands of dollars assembling collections of these large, unwieldy, and mechanically fragile units in their studios. Unfortunately, bringing them to the gig is, at best, impractical. The effects pedal industry has taken notice of this dilemma, however; and a veritable legion of tape-delay based analog/digital hybrid pedals have since been released in order to feed the need for guitarists everywhere to sculpt their sound with the mojo of these revered and ancient units. Of these, the Empress Tape Delay is a personal favorite of mine and the one which I will be reviewing today.
Empress Tape Delay Review
A little background: in 2008, Empress Effects of Canada released a phenomenal delay pedal known as the Superdelay, which was later released as a “Vintage Modified” edition in collaboration with the folks at Pro Guitar Shop in Portland, Oregon. The Tape Delay section of this unit was so popular that in 2013, Empress released it as a standalone unit. With space for three user presets, tap tempo, and the ability to control several unique delay parameters, the Empress Tape Delay is a monster of a pedal in a relatively small box. Also particularly noteworthy is the Tape Delay’s incredible 103db signal-to-noise ratio, which means that not only does it sound absolutely fantastic, but it is extremely quiet as well.
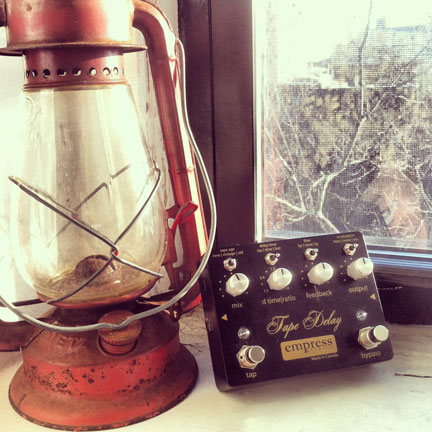
To begin, the Tape Delay is, without a doubt, one of the most aesthetically pleasing effects pedals I’ve ever seen. Housed in a sleek black enclosure and adorned with gold lettering and silver hardware, it resembles a piece of high-quality outboard gear from the Golden Age of Recording. Four knobs controlling “Mix”, “Ratio/Delay Time”, “Feedback”, and “Output” stand in line on the face of the pedal, while positioned above them are a series of micro-toggles for “Tape Age”, “Delay Time”, “Filter”, and “Modulation”. Both “Bypass” and “Tap Tempo” are controlled by two generously-spaced momentary switches, making it quite easy to tap in the proper tempo when syncing your delay up.
Fairly simple looking on the surface (four knobs, four switches), the Empress can actually be configured to operate in two modes – Tap (which I will refer to as “Standard mode”) and Preset.
Empress Tape Delay Presets
PART I: STANDARD/TAP MODE:
In Standard mode, the Empress provides a very straightforward delay experience – every control functions as labeled and you are easily rewarded with some of the richest sounding delay I have ever heard out of a pedal. I’m talking the kind of delay that you turn on and the engineer asks you “What is THAT?!” To note: even with the delay mixed out of the signal entirely, running into this box just makes your guitar sound BETTER, which reminds me of using an Echoplex EP-3 pre-amp. But if you’re looking for delay (and that’s why we’re here, right?), it really is straightforward. Set your output at “noon” for unity gain, mix to two o’clock for repeats that (for me) sit perfectly, and with the “delay time” switch set to “tap”, tap your tempo in and adjust the “Ratio” knob for the desired rhythmic effect. Keep that Feedback knob below three o’clock or things might get a little hairy (The Empress can swell/self-oscillate and does so beautifully if allowed) and just start playing. Play “Where the Streets Have No Name”, play “Run Like Hell”, play “She Sells Sanctuary” – whatever works for you. It all sounds glorious.
You can spice things up a bit by engaging the top row of toggle switches. While “new” tape sounds clean and bright, switching over to “vintage” adds a little “wow and flutter” to the repeats, along with some darkness and grit. Flip it to “old” and things get even darker and dirtier, somewhat lo-fi in character. An even larger amount of modulation is introduced to the signal, and all of this conspires to give the Empress a feel and sound reminiscent of a vintage unit which has been used and abused (widely translated as “loved” in the topsy-turvy world of Rock n’ Roll).
Tap tempo is the quickest to use, and the dedicated momentary switch will input your tempo as the average of your last four taps. You can then adjust the Ratio knob from 1:1/3:4/1:2/1:3/1:4 (Quarter/Dotted Eighth/Eighth/Triplet/Sixteenth) relative to the speed of your tapped tempo.
Should you wish to get more hands on with the timing of your repeats, set the delay time to “fast” or “slow” and spin the Ratio knob clockwise/counterclockwise until they land as you wish.
The “Filter” toggle (inactive in center position) will give you a hi-pass filter on the left, attenuating frequencies below a certain threshold, essentially acting as a “bass cut” for your delayed tone. To the right, you are given the polar opposite of an equally effective low-pass filter, cutting highs and making for a darker sounding delay. Utilizing either of these can really help tailor where the Empress’ syrupy-sweet repeats will sit in a mix.
Lastly, on the far right you are given a “Modulation” option. This adds a somewhat chorus-y character to each repeat, and you have a choice between “little” or “lots”. It can, of course, be disengaged with the switch centered, just as the previous “Filter” toggle.
Now, you might think at first that both “filter” and “modulation” are redundant options, given that Tape Age tends to add a little of each of these anyway – but the switchable quality of both these parameters means that you can have a clean, bright, new tape with your choice of modulation level and frequency response, without the graininess or grit of “Old” or “Vintage”. There’s a lot of possibilities. Take your time and enjoy learning them.

PART II: PRESET MODE/ADVANCED CONFIGURATION
If that was all there was to it, this would already be a well-regarded pedal and one worth writing home (or a review) about. However, the folks at Empress did not stop at “Standard” mode, but also gave us “Preset Mode”, accessible through the “Advanced Configuration”, a somewhat roundabout yet very clever mechanical routine. Seeing as we don’t all require (or desire) LCD screens on our pedals, this is a great feature and no more difficult to set up than mastering the cheat code to “Contra”.
The Tape Delay ships with Presets disabled (there is room for the pedal to store three of them) and with write-protection (i.e. locked presets) off. In order to utilize the full potential of this pedal, you can enter the so-called “Advanced Configuration” mode and set the Empress up for dual operation.
Entering Advanced Configuration requires unplugging the power from your pedal, then plugging it back in while holding down the “Tap” and “Bypass” switches at the same time. You’ll know you’ve done this correctly if the LED on the Bypass switch blinks twice. From this point, you can use the toggle switches to set presets, bypass type, “blips” and preset write-protection. The Tape Age toggle controls the number of presets that can be stored (left; none, center; two, right; three), and true bypass vs buffered bypass is controlled via the Delay Time toggle. Buffered bypass allows for delay “tails” to spill over into your dry signal once you disengage the pedal, allowing for a less jarring transition and a more natural feel to the end of a delayed guitar line. The Filter toggle controls “Blips”, a function which alters way the pedal reacts to the changing of delay times on the fly, allowing for some crazy tape-head inspired sounds as the Ratio/Delay Time knob is turned.
On the far right, the Modulation switch gives you the option of write-protecting your presets. What this means is that once you exit “Advanced Configuration” and begin to create/use presets, they will always revert to their saved form each time they are called up. If you hit a knob or switch accidentally during a performance or feel the need to adjust things in order to “tweak” on the fly, the loaded preset will temporarily change to reflect those values, but they will be safe and sound in their original form for the next time you need them. Conversely, if you feel the need to adjust or edit them permanently, you will need to re-enter Advanced Configuration and disengage write protection in order to accomplish this. I found this to be the only reason I found myself returning to Advanced Configuration, as there have been times where I’ve needed to change my presets rather often.
Once you’ve enabled presets and adjusted parameters in the Advanced Configuration mode to your liking, you can exit by holding down the Tap and Bypass switches, returning the pedal to its normal operating mode. From this point forward, setting the delay time to “Tap” will have the pedal in Standard/Tap operating mode, while setting it to “slow/fast” will put us into preset mode. Once in Preset Mode, your three presets are accessed and controlled by the Tap footswitch (effectively rendering it useless). Hitting the Tap footswitch will cycle through your three presets, each sporting a different color LED – Red, Blue, and Amber.
The one thing about the delay that I could not figure out from reading the manual was how to actually create and edit a preset. I understood how to enter and exit Advanced Configuration, but I had no idea how to actually save or create a preset once I was back in Preset Mode. As it turns out, it was extremely simple, but it took me quite a few frustrating minutes to stumble upon the answer.
In order to create/save presets, once you enter preset mode and load up a preset (say, #1) all you need to do is begin to adjust your knobs and toggle switches. If write protection is off, the pedal will reflect these changes and you can tweak to your heart’s content. The only negative here is lack of that Tap switch – if you are looking to sync up a delay tempo in a preset, you are going to have to do it the old-fashioned way with the delay time knob and slow/fast toggle. This can take some time to get absolutely perfect, as I found out. Once you have created your desired delay tone, hit the Tap Tempo footswitch to cycle to the next preset, automatically saving the one you just completed. Continue this pattern until you have all your presets where you want them, and then enter Advanced Configuration mode once more, flip the modulation toggle to write-protect, exit, and you are all set. Now, switch between “Tap” and “slow/fast” on the Delay Time toggle in order to alternate between Standard and Preset Mode (with your three presets on hand). I realize this all sounds a great deal more complicated on paper than it actually is in practice – it maybe takes twenty or thirty minutes to learn (and memorize) the ins and outs of the pedal.
So, that’s pretty much a wrap. The Empress Tape Delay. Easily one of the best vintage tape-delay inspired pedals out there on the market right now – and one that packs in a whole ton of features along with an incredible auditory experience for a very reasonable price. The Empress may feel a little quirky to some users, especially accessing Presets and Advanced Configuration, but the sound of it is such a winner that once you learn to adjust settings to your liking, this is a delay that may well never leave your pedalboard – it hasn’t left mine (currently, it’s being used in Preset Mode for live performances with Storm of the Century). As stated from the outset, you can plug this pedal in and get amazing and usable delay sounds straightaway, but the true soul of this pedal is not as a simple plug-and-play device. Learn to use it as it was designed and you will be rewarded with a versatile delay, second to none and full of that vintage tape delay mojo that we all know and love. Well-engineered and filled with lush, hi-fidelity sound, the Empress Tape Delay is most certainly one for the ages.
View the Empress Tape Delay on Amazon.


 This is guest post by Scott Martin
 If you want pure authentic surf sounds, then the only way to achieve is with a real outboard spring reverb tank. The best one out there is a Fender Reverb Unit. These units feature a spring tank and real tubes. Today, Fender has made a ’63 Reissue Reverb Unit which is pretty good compared to the original that came out in the ’60s. If you spend an extra 30 bucks on NOS tubes for the reissue, it can actually sound amazing! I have one myself and cannot use anything else when I want to go surfing with my guitar. The Fender Reverb Units retail for about $699, and while expensive, definitely worth it. And if you don’t like it, you could sell it used for almost what you paid for it. Check out the Fender Reverb Unit on
  Surf Guitars
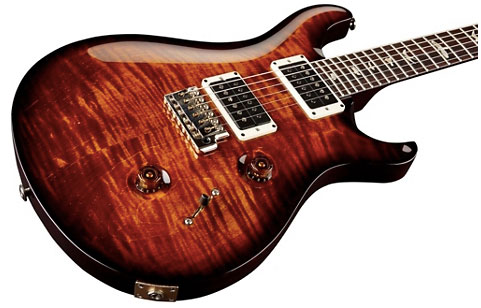
 As guitars go, the Custom 24 is virtually perfect. This guitar, introduced in 1985, is Paul Reed Smith’s signature guitar now available in a 30th anniversary model that does not differ much from the original. The only problem with the Custom 24 is the price tag, which for most players represents a major investment or is simply out of reach. However, if you are serious about your craft, your tone, your sound, a guitar like the Custom 24 is an essential element of your gear line-up. If your budget is limited, the good news is that PRS has now made the Custom 24 available in their SE series. I haven’t played one but the reviews online are very positive and emphasize this is not a cheap Korean guitar and that no shortcuts have been taken in production.
 The Custom 24 comes with a choice of pickups, either the classic HFS bridge/Vintage bass pickups or the 59/09 pickups. There are single volume and tone controls and a five-way blade switch that allows the following configurations: bridge humbucker, bridge humbucker with neck singlecoil (in parallel), bridge and neck humbuckers, neck singlecoil with bridge singlecoil (in parallel), neck humbucker. I like all of the positions but gravitate often to the bridge humbucker for the hot fat tone the HFS pickup puts out. One of the great features of this guitar is the ability to dial the volume down a notch or two and still have the bite of full volume. On the other hand, I’ve seen some reviews that compare the neck singlecoil to a strat and while they sound similar, I wouldn’t call it a strat sound. For that tone, I have a maple neck strat! Just a note, the Custom 24s built prior to 2011 have a 5-way rotary switch not a blade switch–probably the only design flaw in the earlier models–I find it awkward to use on stage.
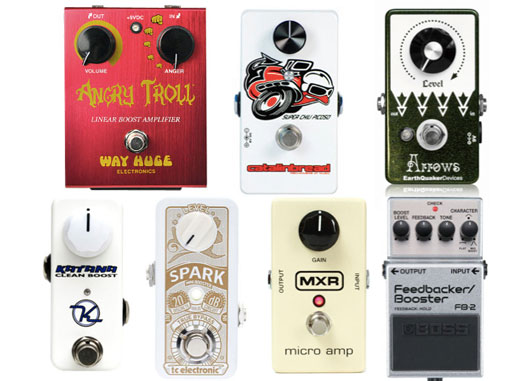
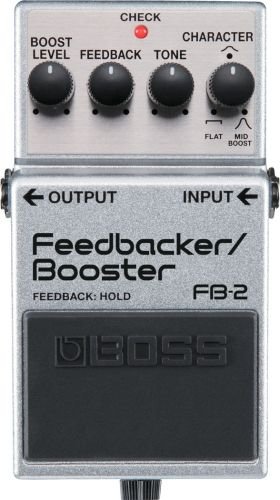 Boss Feedbacker/Booster –This is another fantastic pedal from the Boss lineup. This pedal features the ability to have controlled feedback just by keeping your foot depressed on the pedal for as long as you want the feedback. The pedal features a “Character” knob that allows the player to set the level of boost to either a standard volume boost or some considerable feedback that would make Jimi jealous. The street price for this pedal is $79.00. View this pedal on
 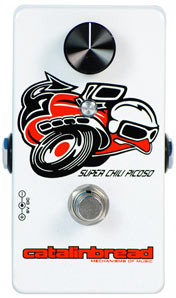 Catalinbread Super Chili Picoso – This is the pedal that put Catalinbread on the map and they have continued to impress ever since. The Super Chili Picoso is a clean boost pedal that allows the player to set the volume level so if you have one guitar that is a low output and a high output there won’t be a volume discrepancy when switching between. This transparent pedal adds up to 35db of boost and should be a considered addition to your pedal board. The street price for this pedal is 109.99. View this pedal on
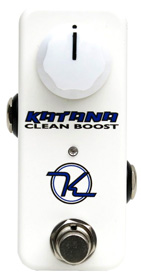
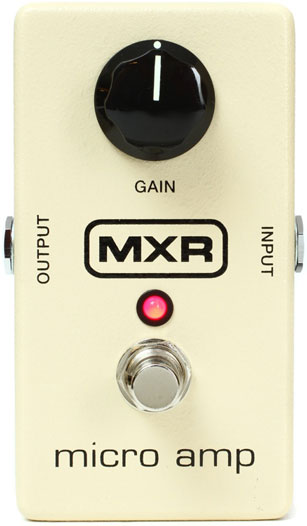
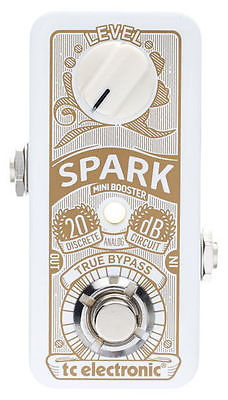 TC Electronic Spark Mini Booster – Here is another well constructed mini pedal that won’t take up a lot of real estate on your board but will have a big impact. The Spark Mini Booster features a 20db boost and “Prime Time” switching that allows the player the option to have it be always on or just to boost a certain aspect of a song. The street price for this pedal is $79.00. View this pedal on
 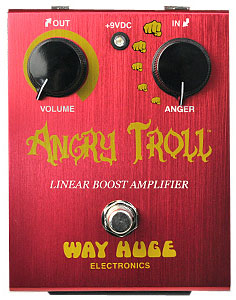 Way Huge Angry Troll – Breaking from the trend of single knob pedals, this two knob booster offers up to 50db of clean gain which is the most out of any pedal on this list. The Angry Troll features an “Anger” knob with five fists of fury that gradually increase in size to indicate the type of overdrive. I have a feeling this is a pedal that you will like when it is angry. The street price for this pedal is $119.00. View this pedal on
 This is a guest post by Sean Murray
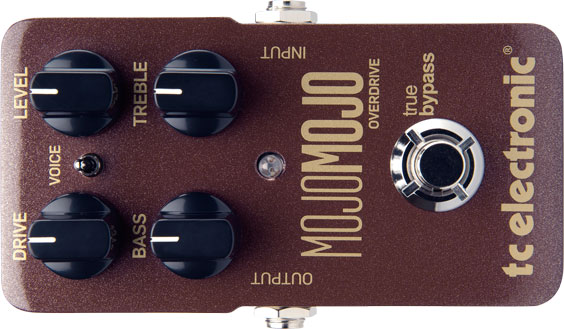
 The world of overdrive pedals can be a little overwhelming to say the least. All this talk about tube saturation this, dual stage that, it’s hard to know where to start when picking an overdrive pedal. Which is why the TCElectronic MojoMojo Overdrive is such a refreshing take on a classic effect. All in all the MojoMojo is a true overdrive pedal in that it accurately replicates the sound of an overdriven amplifier and nothing more. Other overdrive pedals tend to add heavy distortion and color the sound thereby altering the overall tone of your setup. Not so with the MojoMojo. It offers a very straightforward effect while maintaining the tonal characteristics of your guitar and amplifier. That partnered with a compact design, intuitive interface and reasonable price and you have a great pedal to help achieve a thick, silky smooth overdrive.
 There’s a new guitar string company on the market which is modernizing the way you purchase strings. Its quick and easy, feels like you are using an app, and gives you exactly what you want. The idea is simple, you can choose custom string gauges to get the exact tone for your guitar or bass.